- Commissioning
- Connect devices
- Fronius
Fronius
This page describes the configuration and installation of Fronius inverters and hybrid systems on a SOLARWATT Manager.
Table of contents
Compatibility
| EnergyManager pro | Manager flex | |
|---|---|---|
| Fronius Primo / Symo | ||
| Fronius Symo Advanced | ||
| Fronius ECO | ||
| Fronius Primo / Symo GEN 24 | ||
| Fronius Primo /Symo GEN 24 plus [hybrid system] |
| Full compatibility |
Quick guide
- Integrate the inverter into the local network.
- Call up the user interface of the inverter via a browser.
- Make the following settings there:
| Category | Sub-item | Settings |
|---|---|---|
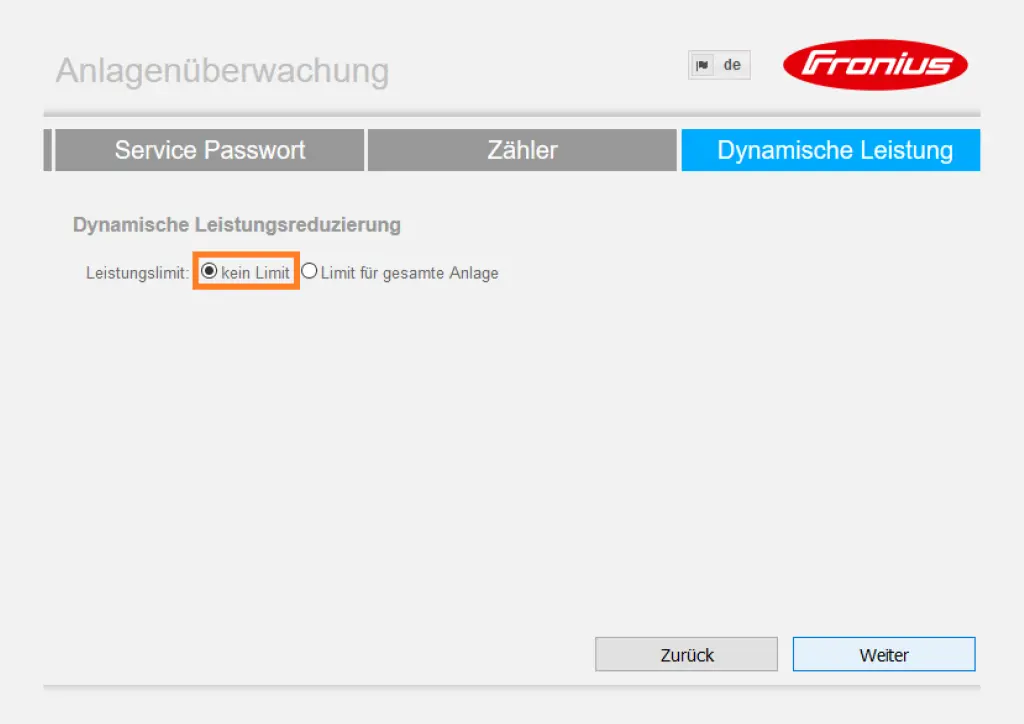
| Technician assistant | dynamic power reduction > Power limit | no limit |
| Solarweb Wizard | Network setup > LAN settings | automatic |
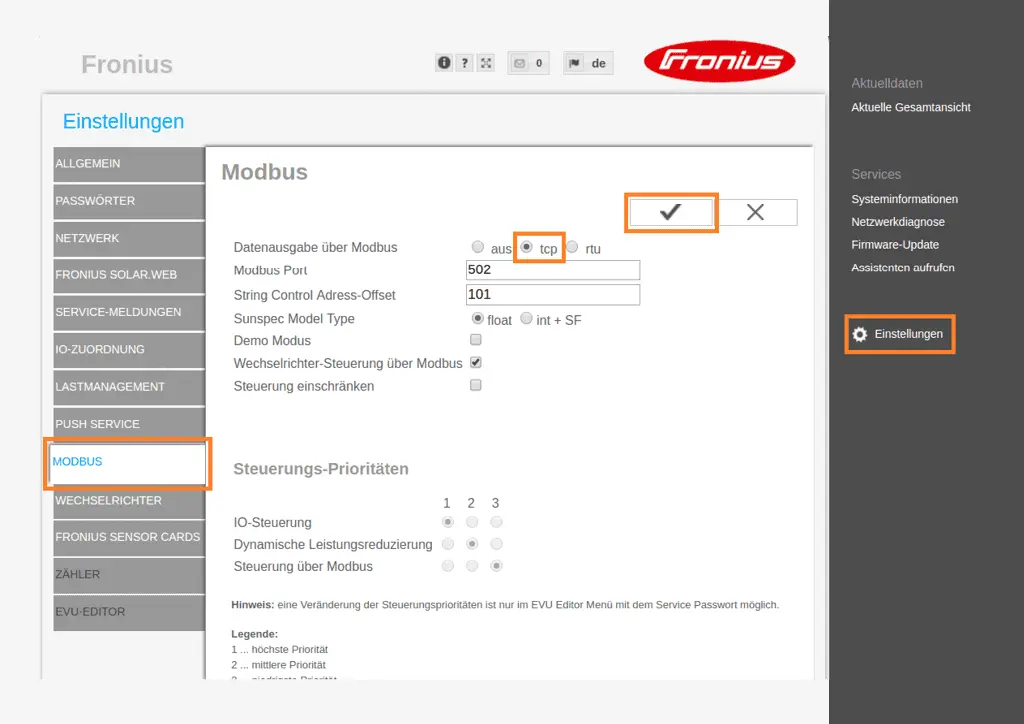
| Automatic settings | Modbus > Data output via Modbus | tcp |
| Modbus > Control via via Modbus | active |
- Activate the night mode of the data interface on the inverter display. Further information can be found here.
- Install the inverter on the SOLARWATT Manager via SmartSetup
Primo / Symo / Symo Advanced configuration
- Connect your laptop to the local network (via LAN cable or WiFi).
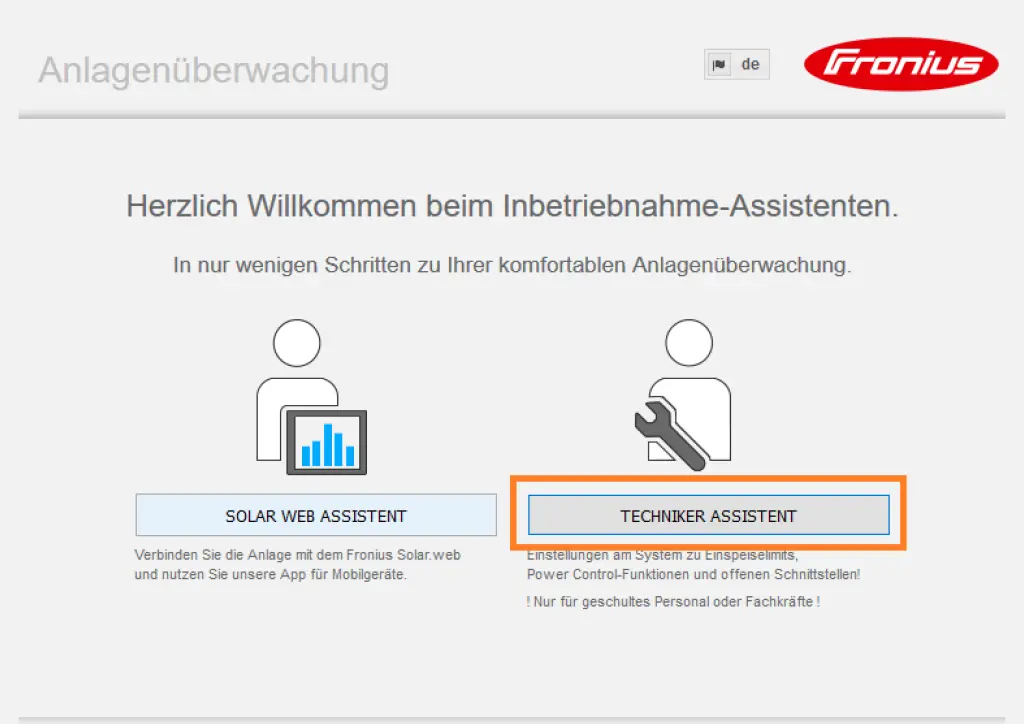
- Open the commissioning wizard in a browser at http://datamanager.
- Select Technician Wizard.
- Follow the installation steps and complete the forms in the submenus.
- Activate the radio button No limit in the Dynamic power submenu.
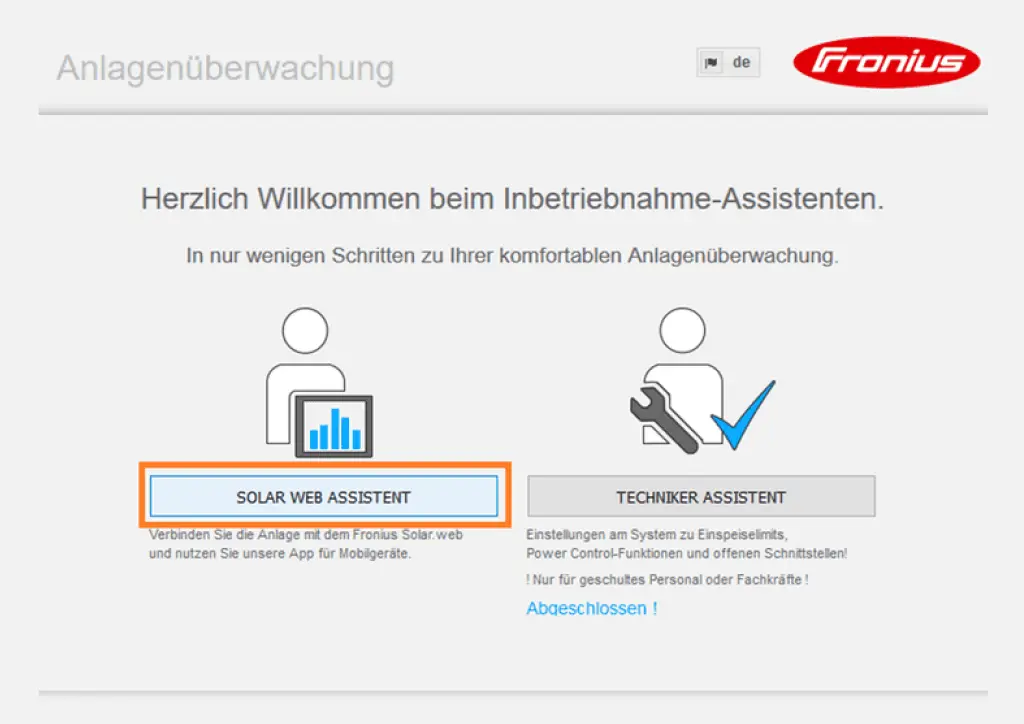
- Click Next and switch to the SOLAR WEB ASSISTANT.
- Activate the radio button dynamically.
- Click on Connect.
- Follow the installation steps and complete the forms in the submenus. Click Save.
- Click the Settings button.
- Select the MODBUS menu item.
- Under Data output via Modbus, select the radio button tcp.
- Activate Inverter control via Modbus
- Click Save.
- Install the inverter on the SOLARWATT Manager via the Smart Setup
Night mode of the data interface
You must activate night mode so that the Fronius inverter can also be installed at night or when there is insufficient DC voltage. The following settings must be made on the inverter display:
- Open the SETUP menu item on the inverter display.
- Select the Display settings submenu.
- Select the Night mode entry.
- Select the ON setting.
- Press Enter.
Primo / Symo GEN24, Primo / Symo GEN24 plus (hybrid) configuration
Attention
Fronius inverters from the Primo GEN24 and Symo GEN24 series are not found and installed in the Manager SmartSetup using autodiscovery. The device search must be carried out by entering the IP address of the inverter. If the IP address changes during operation, the connection between the inverter and Manager will be lost.
We therefore recommend assigning a static IP address to the inverter. There are the following options for this:
- Via the network settings of the inverter
- Via the home network settings of the router ("Always assign the same IP address to the device")
- Open the local user interface of the inverter in a browser.
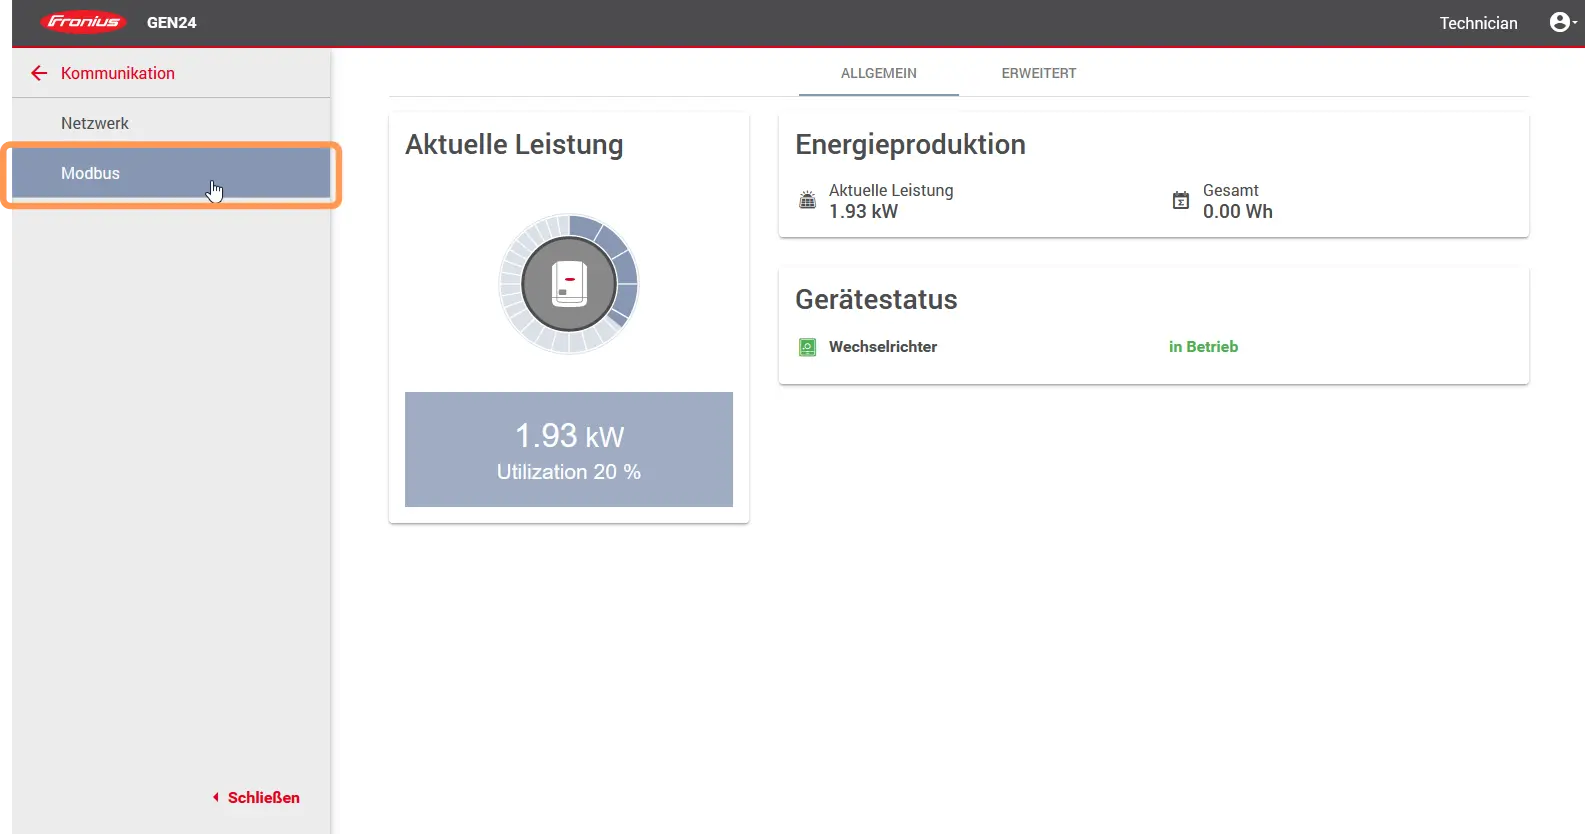
- Call up the Communication menu item.
- Select Modbus.
- Activate the option Slave as Modbus TCP and Inverter control via Modbus.
- Install the inverter and, if applicable, the Smart Meter and battery system on the SOLARWATT Manager via the Smart Setup
Fronius Solar Net Bus
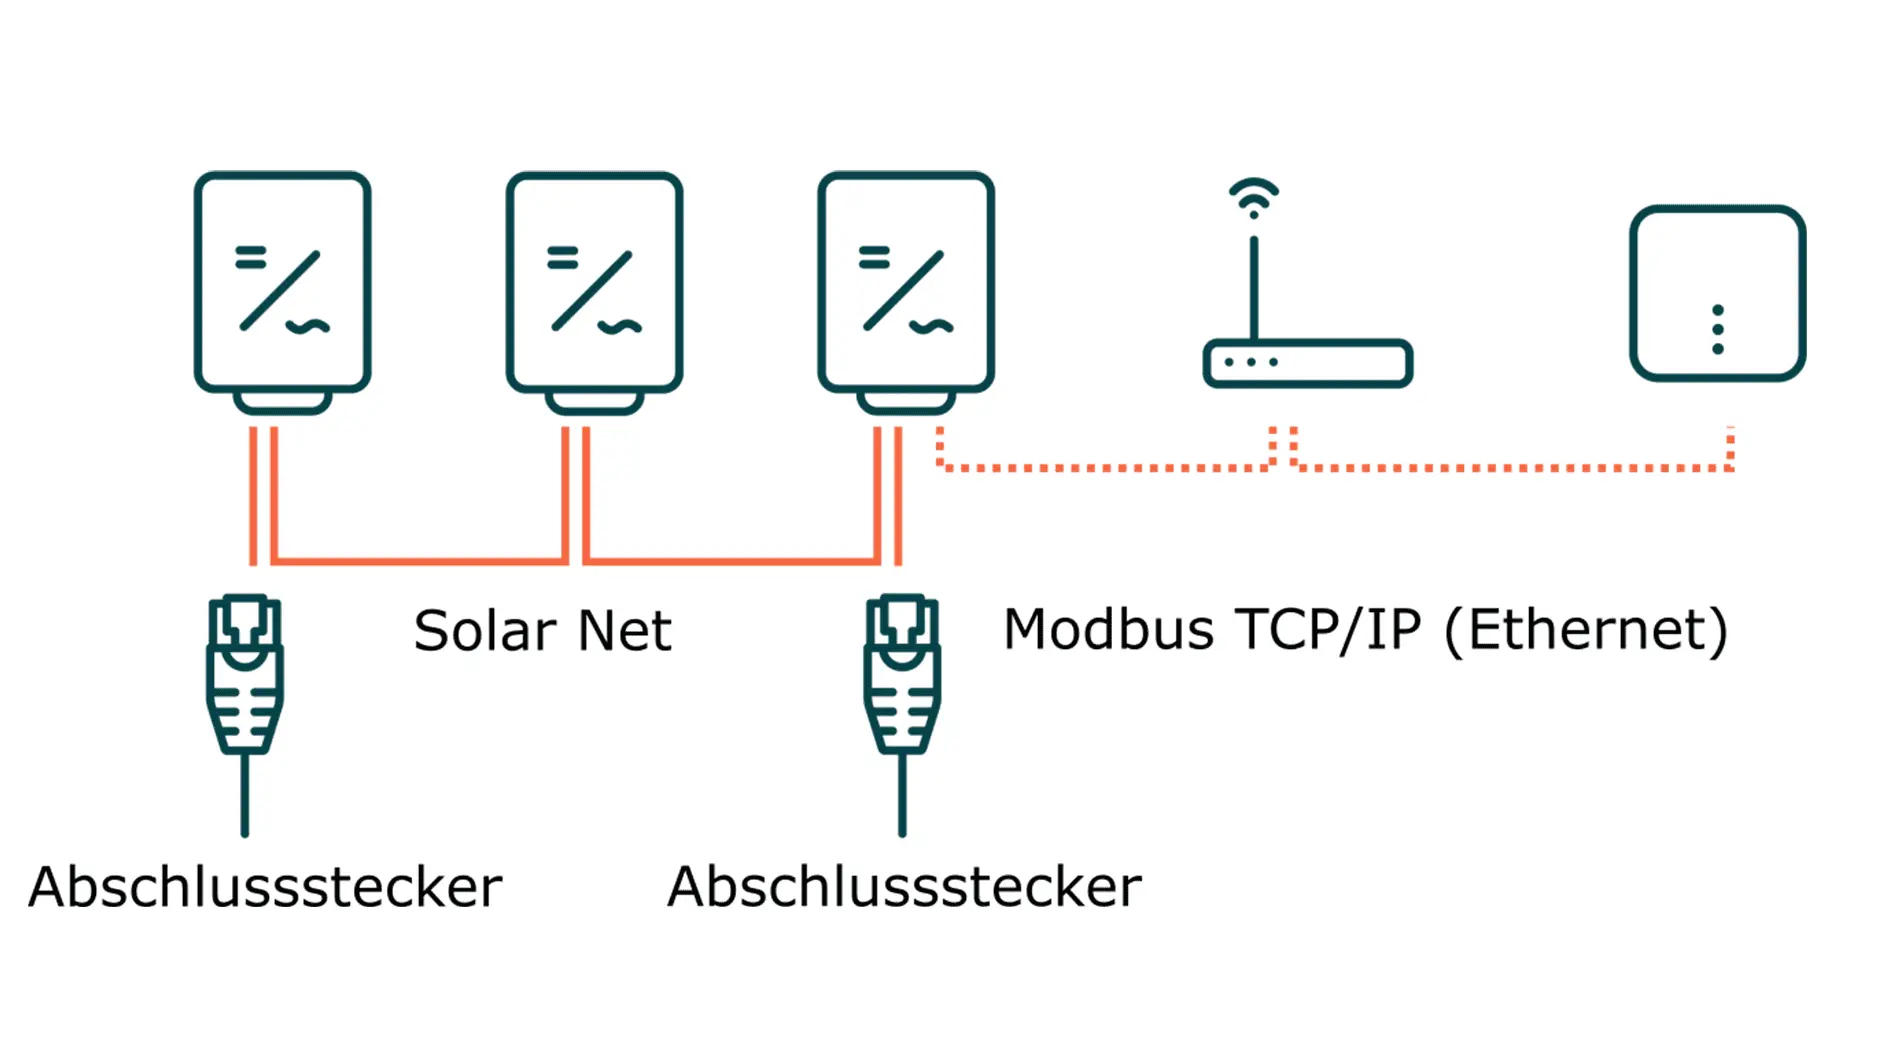
Fronius Solar Net is a communication protocol between Fronius inverters. It can be used to connect up to 100 devices with each other. Only one inverter (master) needs to be connected to the local data network.
- Define the device that is connected to the local network via Ethernet as the master in the settings.
- Define all other devices connected via Fronius Solar Net as slaves.
- Assign each device an individual DATCOM address (1 ... 100).
- Note the need to set a terminating resistor on the first and last inverter of the bus system.
For further information on installing a Fronius Solar Net, please refer to the manufacturer's documentation.
Device search in SmartSetup
Certain inverter models are found and installed automatically (Automatic installation).
Other inverter models are installed by selecting the device driver and specifying the IP address or host name (manual installation).
Information on the installation types of the series can be found in the table at the end of this page.
Automatic installation
If the device is correctly configured and available in the network, it is automatically displayed in green in the device list.
- If necessary, connect additional devices
- Continue with SmartSetup PV plants
Manual installation
- In the Select devices drop-down menu, select or search for the corresponding driver (according to the table at the bottom of the page) for the inverter device.
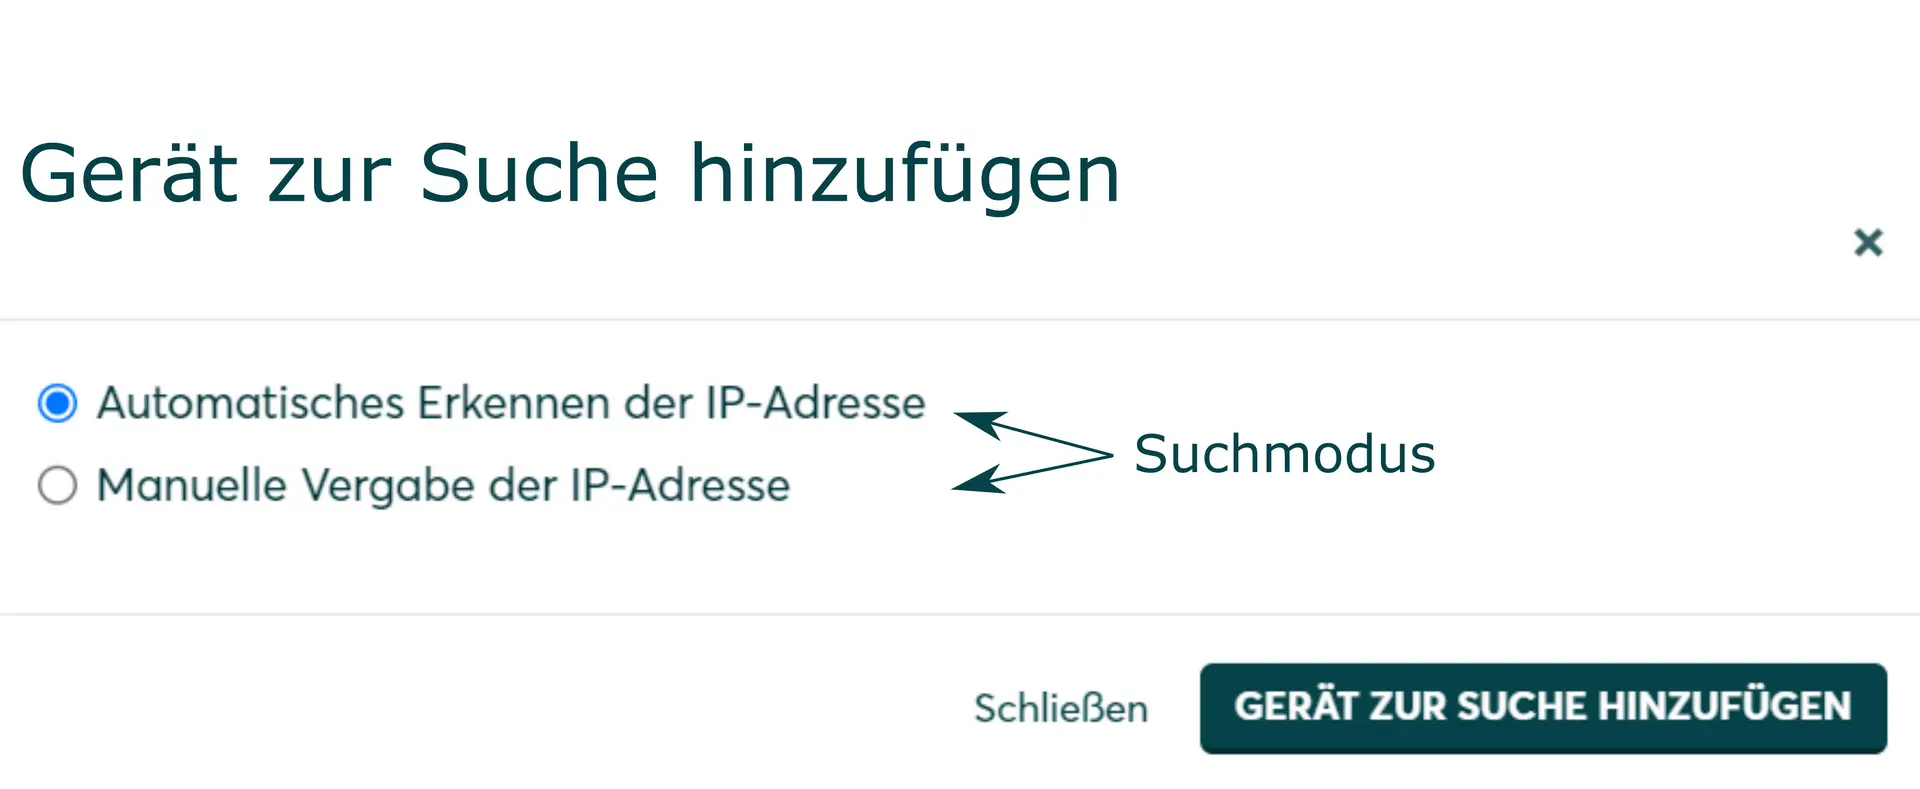
- Select the search mode (according to the table at the bottom of the page) for the inverter device.
- If required, enter the IP address or host name of the device and confirm with Add device to search.
- If necessary, add further devices to the search.
- When the search list is complete, click Search and install devices.
Correctly installed devices appear in the device list with the message: Device is installed. The list also shows the current generation data.
- If necessary, connect additional devices
- Continue with SmartSetup PV plants
| energyManager pro | Manager flex | ||||
|---|---|---|---|---|---|
| Driver | Search mode | Driver | Search mode | ||
| primo/Symo | Fronius | Automatic detection of the IP address | Automatic installation | ||
| ECO | Fronius | Automatic detection of the IP address | Fronius SunSpec inverters | Manual assignment of the IP address | |
| Symo Advanced | Fronius | Automatic detection of the IP address | Fronius SunSpec inverter | Manual assignment of the IP address | |
| Primo / Symo GEN 24 | Fronius | Manual assignment of the IP address | Fronius SunSpec inverter | Manual assignment of the IP address | |
Primo / Symo GEN 24 [Hybrid system] | Hybrid systems (Fronius hybrid inverters) | Manual assignment of the IP address | Kaco NX3, Fronius Symo Gen24 device | Manual assignment of the IP address* | |
*) For hybrid systems and / or when using the Fronius Smart Meter as the main meter, a double device search is required:
- Inverter and battery installation
- Host: [IP address]
- Unit ID: 1
- Installation SmartMeter
- Host: [IP address]
- Unit ID: 200
Selected articles:
