- Commissioning
- Connect devices
- EGO Smart Heater
EGO Smart Heater
This page describes how to connect an EGO Smart Heater to the SOLARWATT Manager.
The EGO Smart Heater is a controllable screw-in heater for heating water and aqueous solutions, e.g. water storage tanks. The EGO Smart Heater is suitable for increasing self-consumption by converting electrical energy, e.g. from PV plants, into thermal energy.
The SOLARWATT Manager controls the EGO Smart Heater according to the available surplus. The EGO Smart Heater does not regulate to a set temperature.
Two versions are available:
- with Ethernet interface (compatible with SOLARWATT Manager flex and EnergyManager pro)
- with RS485 interface (compatible with EnergyManager pro)
Compatibility
| EnergyManager pro | Manager flex | |
|---|---|---|
| EGO Smart Heater - Ethernet | ||
| EGO Smart Heater - RS485 |
| Full compatibility | |
| No compatibility |
Installation and configuration
Manager flex interface: ETHERNET
EnergyManager pro interface: ETHERNET or RS 485
Note: Parallel use of both interfaces is not possible.
EnergyManager pro interface: ETHERNET or RS 485
Note: Parallel use of both interfaces is not possible.
Applicable documents
Connecting the EGO Smart Heater via Ethernet
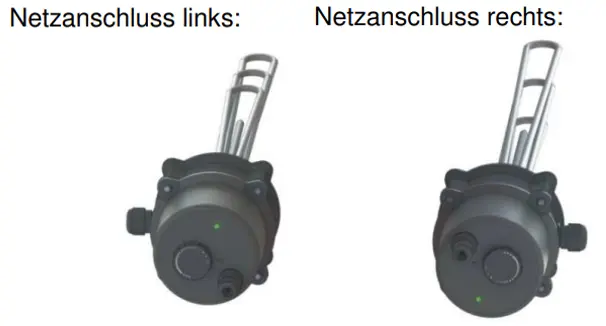
- Install the EGO Smart Heater in accordance with the manufacturer's Installation instructions. Always observe the installation position recommended by the manufacturer (see below).
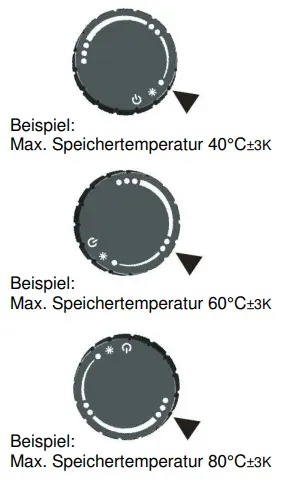
- Select the desired limit temperature using the rotary knob on the EGO Smart Heater (see below).
- Connect the device to the local network or connect the device to the RS 485 interface of the EnergyManager pro
- Ensure that the EGO Smart Heater can be reached via the local network. To do this, use either the network overview of the router or a network scan software
Connecting the EGO Smart Heater via RS485
- Install the EGO Smart Heater in accordance with the manufacturer's Installation instructions. Always observe the installation position recommended by the manufacturer (see below).
- Select the desired limit temperature using the rotary knob on the EGO Smart Heater (see below).
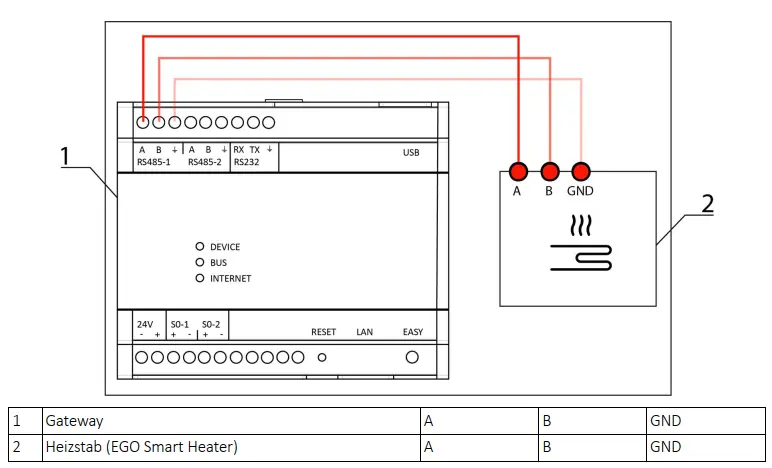
- Connect the heating element and EnergyManager as shown in the diagram
Loading position
Maximum cylinder temperature
The maximum cylinder temperature is set using the rotary dial on the EGO Smart Heater. The triangular marking is located next to the mains connection.
Device search in SmartSetup
Certain device types are found and installed automatically(Automatic installation)
Other device types must be installed by selecting the device driver and specifying the IP address or host name(manual installation).
Information on the installation types can be found in the table below.
Automatic installation
If the device is correctly configured and available in the network, it is displayed in green in the device list.
- If necessary, connect additional devices
- Continue with SmartSetup PV plants
Manual installation
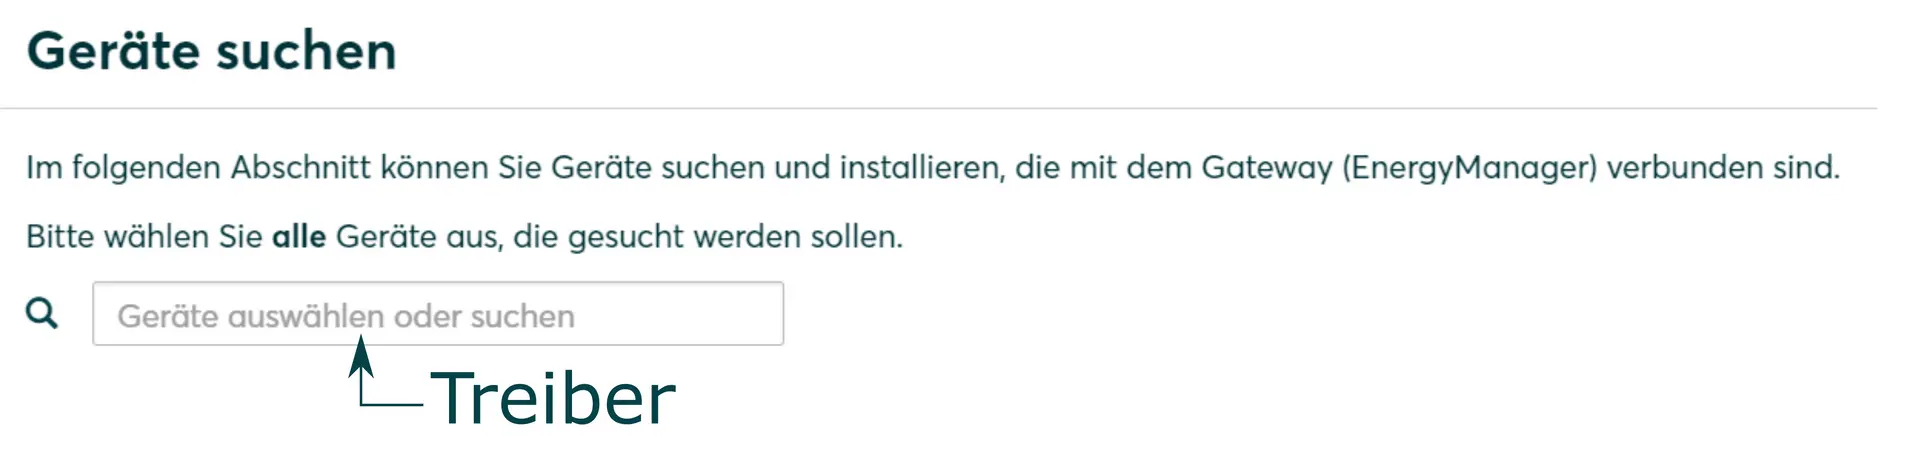
- Select Select devices in the drop-down menu or search for the corresponding entry according to the table below.
- Enter the required specifications according to the table below:
- Search mode
- iP address or host name, if applicable
- Click Add device to search.
- If necessary, add further devices to the search.
- Once you have added all the devices to be searched for, click Search for and install devices.
You can recognize correctly installed devices by the message: Device is installed. in the device list. The list also shows the current creation data.
- If necessary, connect additional devices.
- Continue with SmartSetup PV plants.
Driver selection for device search
| energyManager pro | Manager flex | ||||
|---|---|---|---|---|---|
| Driver | Search mode | Driver | Search mode | ||
| EGO Smart Heater | EGO Smart Heater |
| Automatic installation | ||
Troubleshooting
Connector via Ethernet
If the device is not found via the automatic search / automatic IP detection, check whether the device is available in the local network (via network scan - note, a network scan requires the prior consent of your customer - or access to the local user interface of the router).
If necessary, restart the devices.
Connection via RS485
The connected heating element is not found in the Smart Setup app:
The majority of communication problems are due to faulty cabling.
- Check the connection of the device, rule out cable breaks in the connection cable.
- Swap A and B.
- The connection cables should not be laid together with cable bundles with high current loads.
PV optimization settings
Additional settings are required to operate the device with a maximum proportion of solar power (PV optimization).
The settings for PV optimization are made in the SOLARWATT Manager portal under Optimization.
Selected articles: