- Commissioning
- Connect devices
- Shelly Pro (1, 2, 4)PM
Shelly Pro (1, 2, 4)PM
This page describes the installation and setup of a Shelly Pro (1, 2, 4)PM device on a SOLARWATT Manager.
Compatibility and possible applications
| EnergyManager pro | Manager flex | Firmware | |
|---|---|---|---|
| Shelly Pro (1, 2, 4)PM |
|
| > 0.12.0 |
Installation and configuration
Interface: WiFi, LAN
WiFi frequency band: 2.4 GHz
WiFi frequency band: 2.4 GHz
Applicable documents
User and safety manual Shelly Pro 1PM (Installation instructions)(498.7 KB, PDF)User and safety guide Shelly Pro 2PM (Installation instructions)(511.4 KB, PDF)User and Safety Manual Shelly Pro 4PM (Installation instructions)(4.6 MB, PDF)Installation instructions Shelly Pro 4PM via Shelly app(579.3 KB, PDF)List of compatible Shelly devices and their applications(664.2 KB, PDF)
- Ensure the absence of voltage and verify it.
- Install the Shelly device.
- Optional: Establish a LAN connection to the local network.
- Restore the power supply.
Integration into the local network
For the initial installation, the Shelly device generates a WiFi access point.
- Connect a suitable device to the WiFi access point of the Shelly device.
- Call up the Shelly device's user interface in a browser (IP address: 192.168.33.1)
The Shelly Pro (1,2,4) PM can be integrated into the local network via LAN or WiFi.
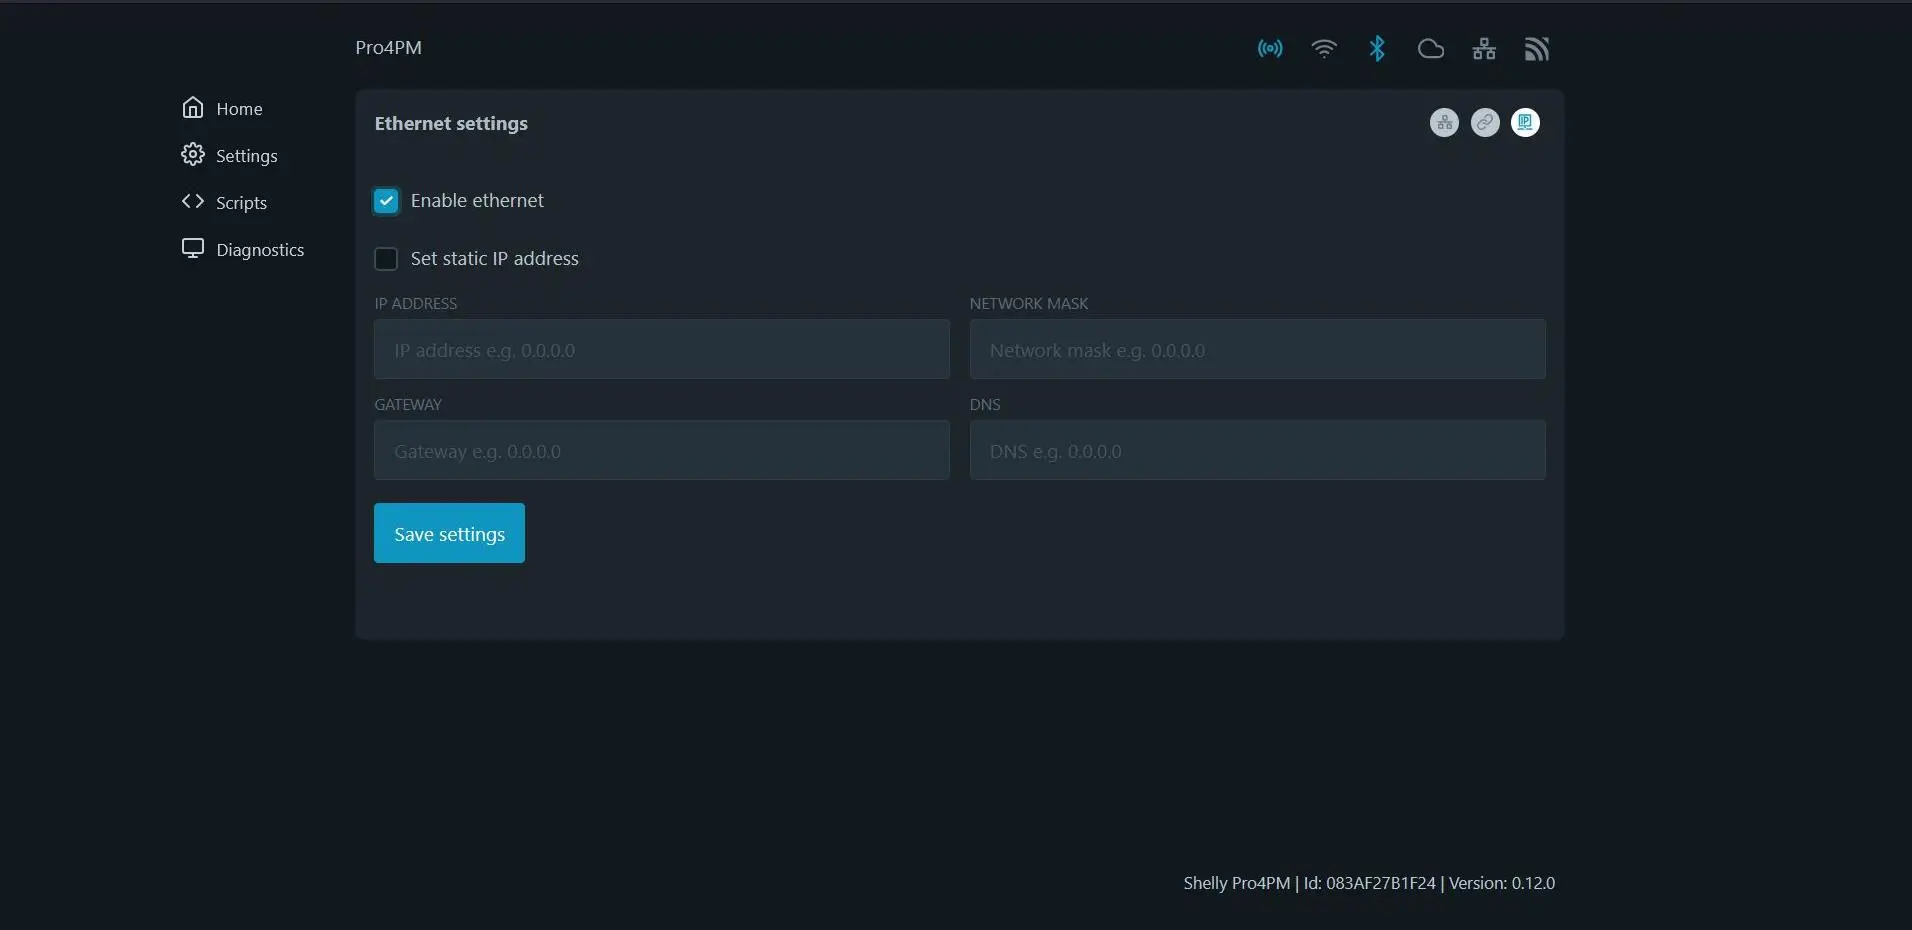
Setting up the LAN connection
- Establish an Ethernet connection to the local network for the Shelly device.
- Activate the connection to an existing LAN network in the Settings > Ethernet menu.
- The Shelly device is assigned a new IP address. If you want to assign a static IP address, activate the corresponding checkbox and assign an IP address. In the router's user interface, you can view the IP address range of the home network and IP addresses that have already been assigned.
- Deactivate the WiFi access point
- Restart the Shelly device.
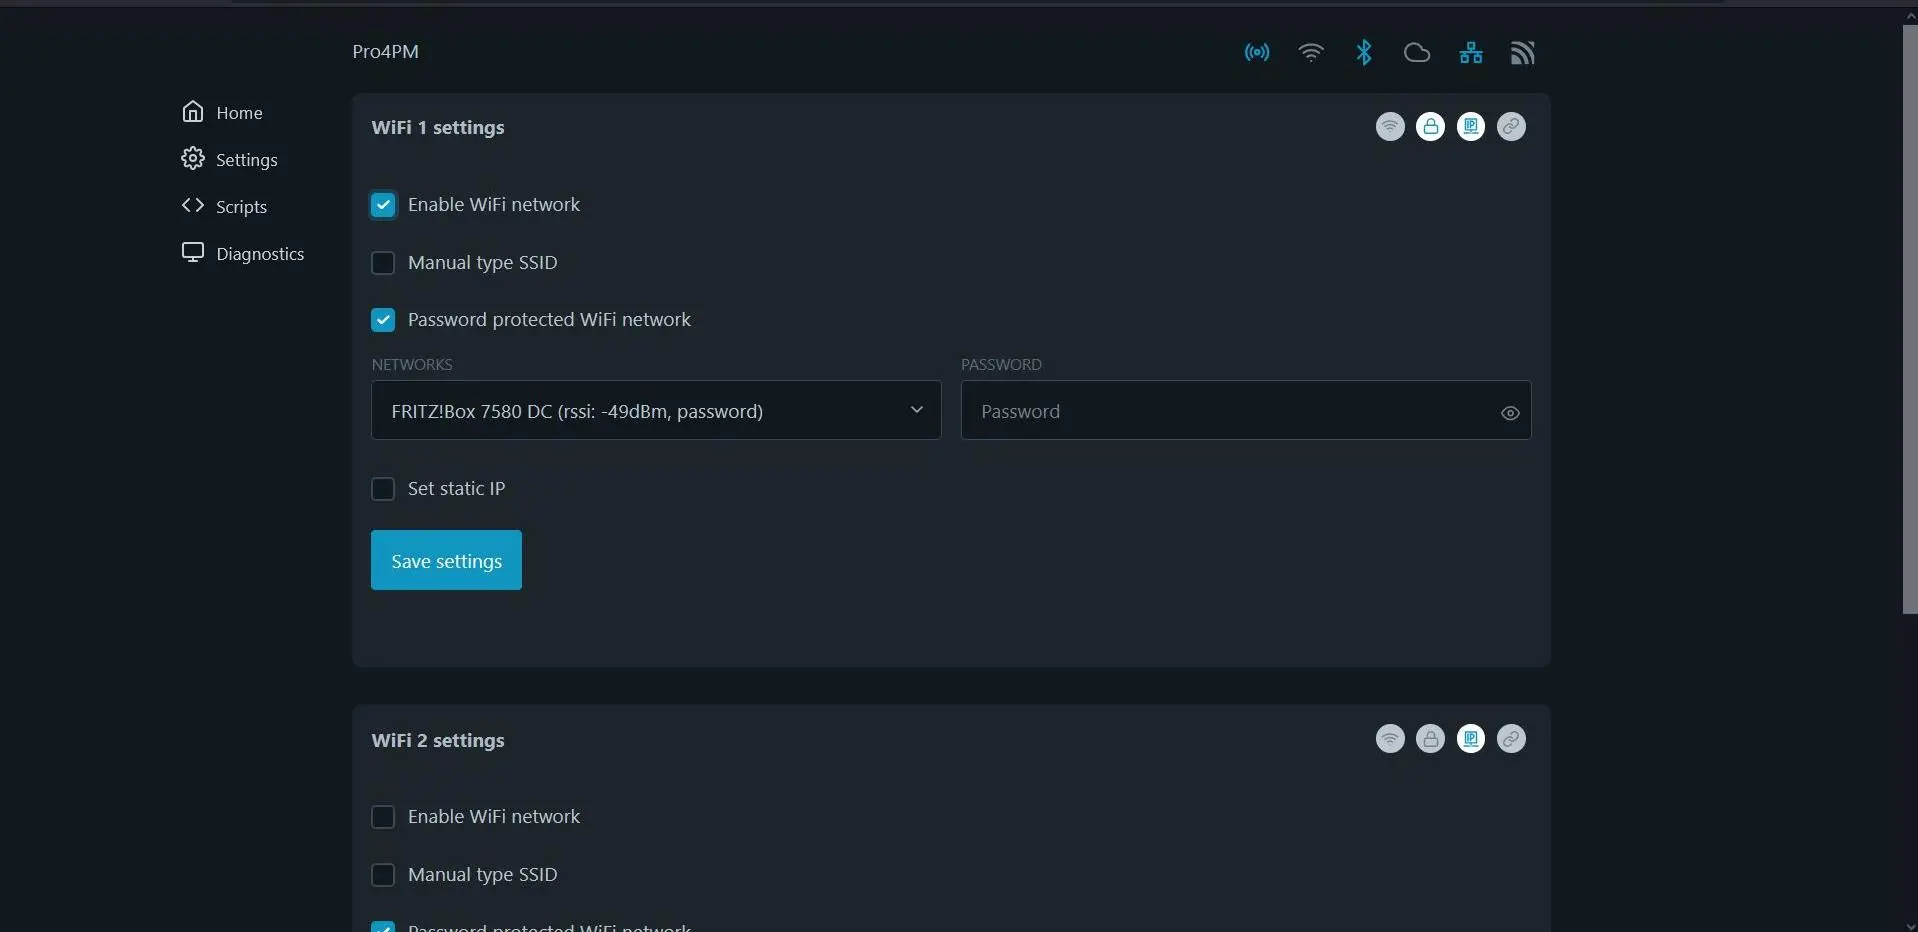
WiFi setup - connector
- Activate the connection to an existing WiFi network in the Settings > WiFi menu. Enter the name and password of the local network.
- The Shelly device is assigned a new IP address. If you want to assign a static IP address, activate the corresponding checkbox and assign an IP address. In the router's user interface, you can view the IP address range of the home network and IP addresses that have already been assigned.
- Deactivate the WiFi access point
Device search in SmartSetup
Certain device types are found and installed automatically(Automatic installation)
Other device types must be installed by selecting the device driver and specifying the IP address or host name(manual installation).
Information on the installation types can be found in the table below.
Automatic installation
If the device is correctly configured and available in the network, it is displayed in green in the device list.
- If necessary, connect additional devices
- Continue with SmartSetup PV plants
Manual installation
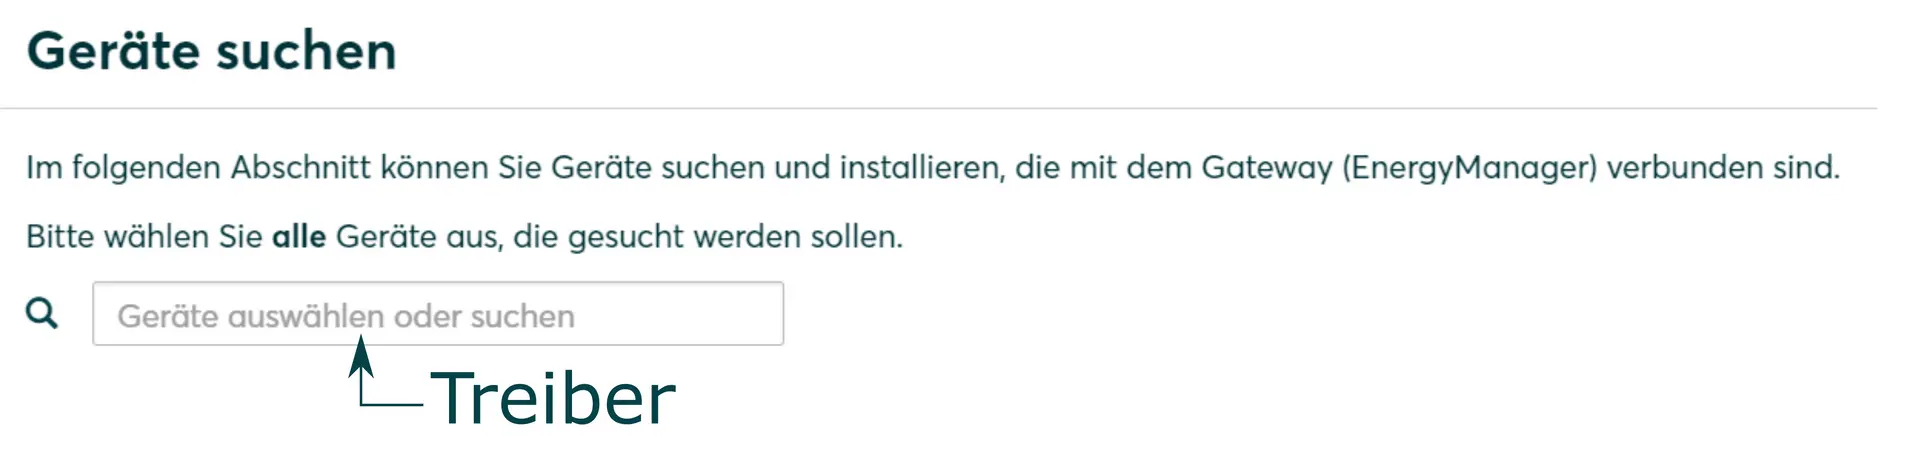
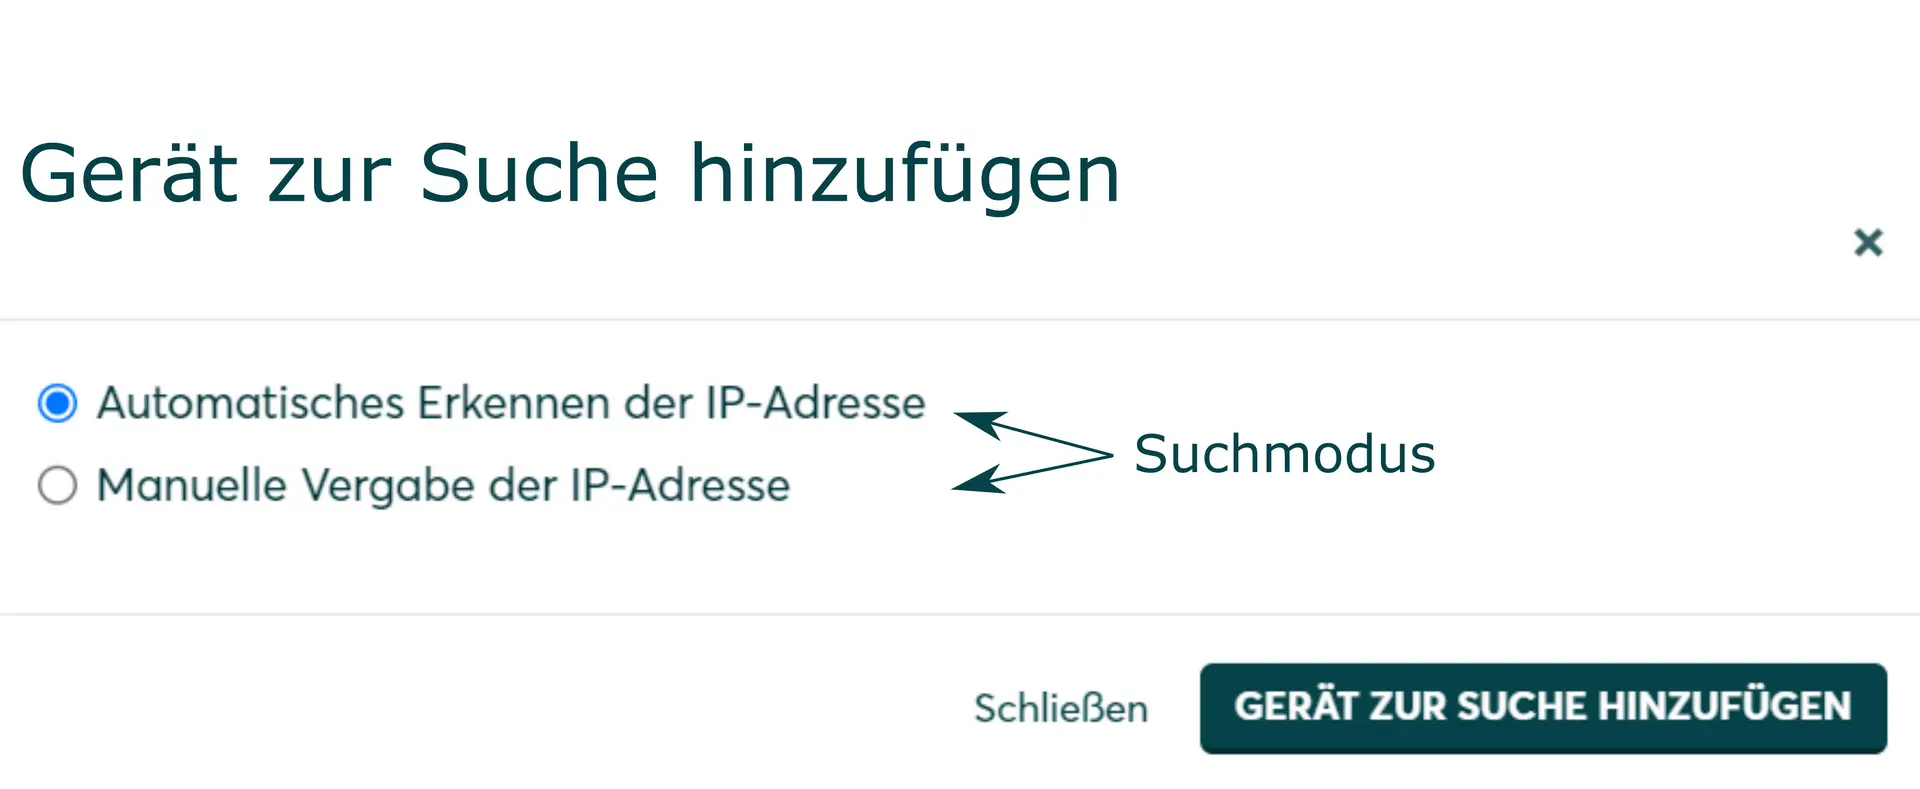
- Select Select devices in the drop-down menu or search for the corresponding entry according to the table below.
- Enter the required specifications according to the table below:
- Search mode
- iP address or host name, if applicable
- Click Add device to search.
- If necessary, add further devices to the search.
- Once you have added all the devices to be searched for, click Search for and install devices.
You can recognize correctly installed devices by the message: Device is installed. in the device list. The list also shows the current creation data.
- If necessary, connect additional devices.
- Continue with SmartSetup PV plants.
Driver selection for device search
| energyManager pro | Manager flex | |||||
|---|---|---|---|---|---|---|
| Driver | Search mode | Driver | Search mode | |||
| Shelly Pro (1, 2, 4) PM | Shelly (Allterco Robotics) | Automatic** | Shelly Device | Specify host name (recommended)* or Specify IP address | ||
*) Determination of the host name via the Shelly configuration interface(Internet&Security > WiFi mode - Access Point) or via network scan software or home network overview of the router.
**) Assignment of a static IP address via the network settings of the Shelly device recommended.
Troubleshooting
If the device is not found via the automatic search / automatic IP detection, check whether the device is available in the local network (via network scan - note, a network scan requires the prior consent of your customer - or access to the local user interface of the router).
If necessary, restart the devices.
Selected articles: