- Commissioning
- Connect devices
- my-PV ELWA-2 / AC-THOR
my-PV ELWA-2 / AC-THOR
This page describes how to connect the my-PV AC ELWA-2, AC•THOR and AC THOR 9s devices to the SOLARWATT Manager.
Compatibility
| EnergyManager pro | Manager flex | Firmware | |
|---|---|---|---|
| ELWA-2 |
|
| > e0000604 |
| AC•THOR |
|
| |
| AC•THOR 9s |
|
| |
| AC•THOR i |
|
|
| Full compatibility |
| No compatibility |
Installation and configuration
Interface: Ethernet
No. of connectable my-PV ELWA-2: 3
No. of connectable my-PV AC•THOR / THOR 9s / THOR i: 3
No. of connectable my-PV ELWA-2: 3
No. of connectable my-PV AC•THOR / THOR 9s / THOR i: 3
Applicable documents
The data sheet, operating and Mounting instructions and other relevant documents can be found on the manufacturer's product pages:
https://www.my-pv.com/en/products/ac-elwa-2/
https://www.my-pv.com/en/products/ac-thor/
Calling up the configuration interface
- Connect the my-PV device to the local network and start the device.
- The IP address can be determined via the device display: Main menu item Details ("i" symbol in the footer of the display, subpage 3/8, IP entry).
- Enter the IP address of the my-PV device in the address line of your browser.
- Start the configuration interface of the my-PV device.
- Enter the IP address range of the home network or the network in which the my-PV device is located.
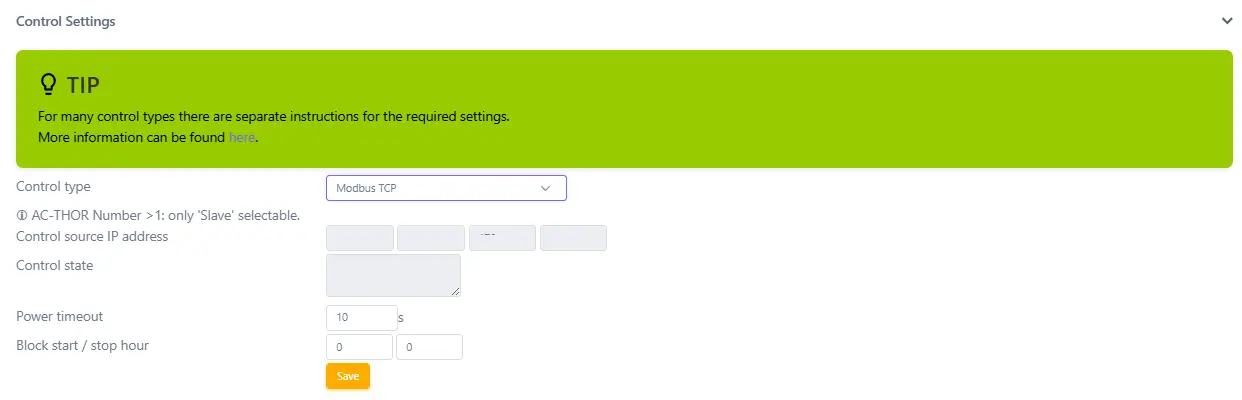
Activate communication via Modbus TCP
- Open the settings menu by clicking on the gear icon at the top right.
- Open the Control settings section.

- Select Modbus TCP as the control type.
- Enter a value of 60 seconds for Power timeout.
- Press the Save button.
- The IP address of the controller is updated automatically when the SOLARWATT Manager flex and the my-PV device are connected for the first time.
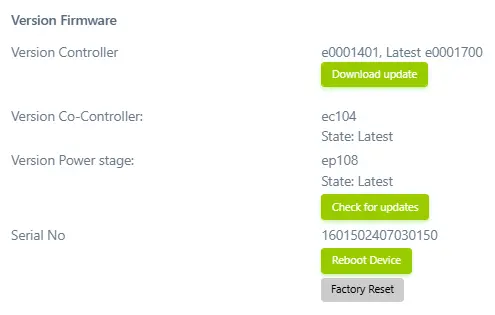
Firmware update
To ensure trouble-free operation, we recommend operating the my-PV device with firmware version e0000604 or higher ("Control version").
- Call up the Version Software submenu.
- Click on the Download software button.
Setup in SmartSetup
Search for devices
- Select and select my-PV Device in the Select or search for devices search field.
- In the following dialog, select Automatically detect IP address.
- Click on Add device to search
- If necessary, add further devices (inverters, battery storage, etc.) to the search. Instructions for connecting additional devices can be found under Connecting devices.

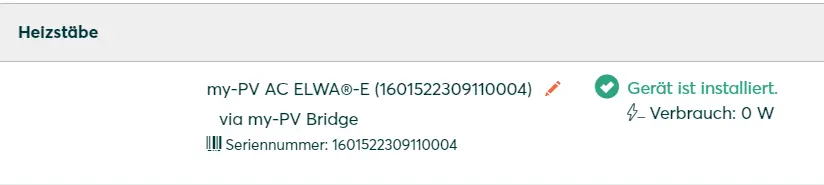
- Click on Search and install devices.
- After successful installation, the device is listed under the heating elements device class with the message Device is installed.
House consumption
- Classify the device according to the electrical installation. As a rule, the assignment must be made under Devices registered by the main meter.
- Complete the configuration according to the house installation. You can find instructions here: Smart Setup
Display and optimization in the SOLARWATT Manager portal
Once the my-PV device has been integrated into the Smart Setup, its consumption is displayed in the SOLARWATT Manager portal in the Analytics section under Consumption.
Due to the infinitely variable power setting, the my-PV devices are ideal for consuming excess PV power yourself. The power consumed is transmitted to the Manager flex. This regulates the heating element according to freely definable switching criteria.
The switching criteria can be set in the SOLARWATT Manager portal in the energy optimisation area.
Selected articles: