- Home
- SOLARWATT Manager
- Error Statuses and Troubleshooting
Error Statuses and Troubleshooting
Manager
Error statuses are displayed on the Manager unit's LEDs.
Status LED solid red: Cannot connect to the internet
A red light means that internet communication has been disrupted:
Check the Internet connection
- Try to access any website with a laptop, smartphone, or tablet that is connected to the same router (via LAN or Wi-Fi). If the website fails to load, there is a general fault with the Internet connection.
- If it is possible to access a website but the Internet LED remains red, check the Ethernet or PLC connection.
Checking the Ethernet connection
The aim is to check the connection between the Manager and the router and repair it if necessary.
- Check the cabling between the Manager and router (or network switch).
- Restart all network components involved (router, switch, WiFi adapter, Manager).
- Check whether the Manager can be reached in the local network by entering its IP address in the address bar of the browser.
Powerline Communication (PLC) - Check connector
Applies to SOLARWATT Manager flex 1.0 only.
- Restart the Powerline adapters.
- Establish a new PLC connection. Further information can be found here.
Status LED flashing green: Firmware update in progress
|
When the Manager is switched on, the status LED will change between various colour states. After about 2 minutes, the status LED should light up green continuously.
When the Manager is connected to the internet for the first time, after approximately 5 minutes it will update the firmware to the latest version. This update process is indicated by a green flashing status LED. The duration of the update generally depends on the bandwidth of the Internet connection as well as the speed of the local network. Generally, firmware updates should take no longer than 20 minutes.
Status LED flashing green for longer than 20 minutes
An unstable Internet connection may mean that the update cannot be completed. If the update process takes longer than 20 minutes, take the following steps:
- Disconnect the Manager from the power supply
- Ensure the Manager is connected directly to the Internet gateway (router) via the Ethernet port
- Start the Manager by reconnecting the power supply
If these steps do not lead to a successful update, please contact SOLARWATT Support.
SmartSetup
Errors that can occur when configuring the SOLARWATT Manager in SmartSetup.
Inverter is not found and installed automatically
The inverter is not found and installed automatically by the Manager. This could be caused by:
- Inverter model is not supported by Autodiscovery
- Inverter is not connected to the same local network
- Inverter has been incorrectly configured
- Inverter is not in the same subnet as the Manager
Inverter model is not supported by Autodiscovery
Autodiscovery refers to the automatic finding and installation of devices. Check the list of supported devices.
Inverter is not connected to the same local network
The inverter is not in the local network and therefore cannot be reached by the Manager. Ensure the inverter has been connected to the same local area network as the Manager.
Inverter incorrectly configured
Modbus TCP must be activated in the connection settings of the inverter so that it can be recognized and installed by the Manager.
Inverter not in the same subnet area as the Manager
Relevant if the inverter has been manually assigned an IP. This must be in the same class C network area as the Manager.
Inverter fails to start data communication
Under certain circumstances, it may not be possible to retrieve data from the inverter despite correct settings. In such cases, restarting the inverter can help.
Most inverters can be restarted by temporarily interrupting the DC and AC voltage. To carry out a restart, please first follow the corresponding instructions in the inverter operating manual.
SOLARWATT Manager portal
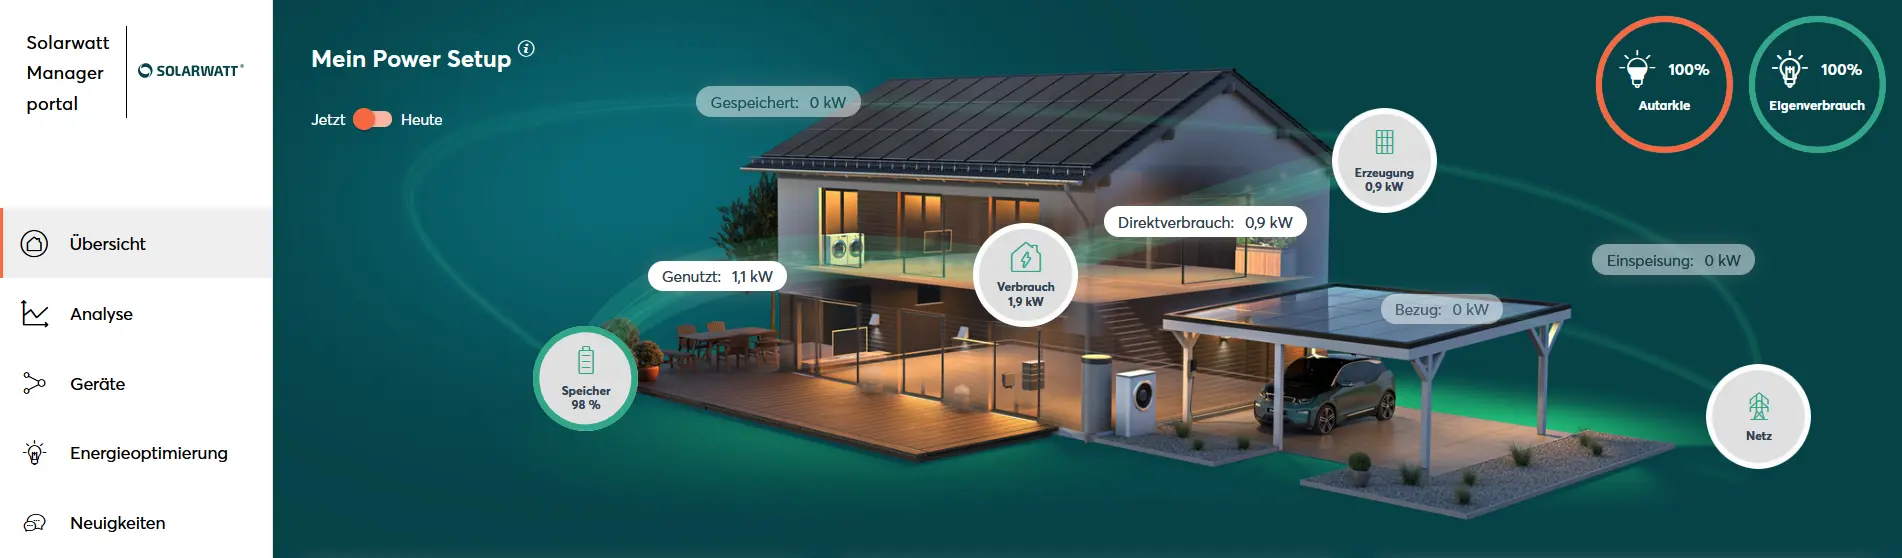
Incorrect or no data displayed in the dashboard
Incorrect data appearing in the portal can be caused by:
- an incorrect assignment of system components during SmartSetup - see below.
- the Manager not having been restarted after the customer's account has been assigned to it.
- the Manager has lost communication with one or more system components.
Check that SmartSetup has been carried out correctly
Open the SmartSetup app and check whether the assignment of the system components or the settings made correspond to your system configuration. You should check the following in particular:
"PV plants" setup step
- Ensure all inverters are correctly assigned to the PV plant(s)
- Ensure all DC-coupled batteries are assigned to the PV plant(s)
- Ensure you have entered the correct power class of each module
- Ensure you have correctly set the consumption-dependent curtailment percentage value
"Home consumption" setup step
A main meter is a mandatory part of every installation. The configuration must correspond to the meter type used and the topology of the domestic installation.
Position between grid and PV plants
- If an ACS (via a Battery flex or MyReserve) is installed, it is automatically defined as a bidirectional meter for the position Between grid and PV plants. This is the only correct configuration if the setup contains a battery system.
- After replacing the Battery flex, you must check whether the corresponding main meter has been selected (identification via the serial number fragment in the name of the Battery flex).
Position Between mains and consumers (consumption meter)
- This meter position may only be selected if this also corresponds to the house installation.
- Only installation meters are required at this position.
- Please note the correct counting direction: The meter must record the electrical power consumed by the household
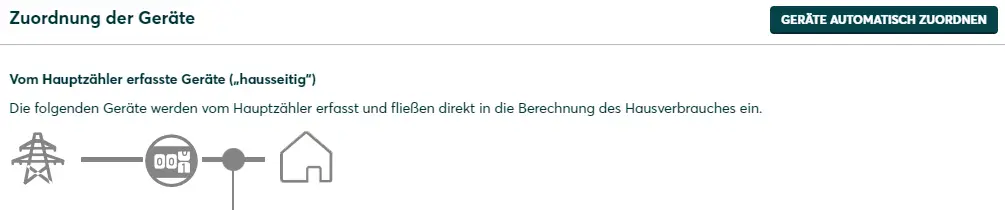
Assignment of the devices
All devices should be automatically configured on the house side. If a bidirectional meter is installed as the main meter. This applies to the following device classes:
- PV plants
- Consumers
In most cases, this corresponds to the topology of the domestic installation.
Under certain circumstances, however, this automatic allocation may not apply and appliances may therefore be listed under the unbalanced category. In the vast majority of cases, this is not intentional and represents a misconfiguration.
Press the Assign devices automatically button to move all devices to the category Devices recorded by main meter ("house-side") .
Restarting the Manager after assigning the customer
During initial commissioning, the SOLARWATT Manager flex must be restarted after customer registration, otherwise no data will be displayed in the end customer portal. To do this, disconnect the gateway from the power supply for about 5 seconds.
Accessibility System components
Your home installation consists of a PV inverter, a battery storage system and a main meter. If one of the components cannot be reached by the Manager, this can have the following effects:
- no data display in the Manager portal
- implausible data display in the Manager portal
Check the connection status of the devices in the Manager portal(energymanager.com) in the device list. To do this, click on Devices on the start page of the portal to the left of the energy flow diagram:
You will then be taken to the device list:
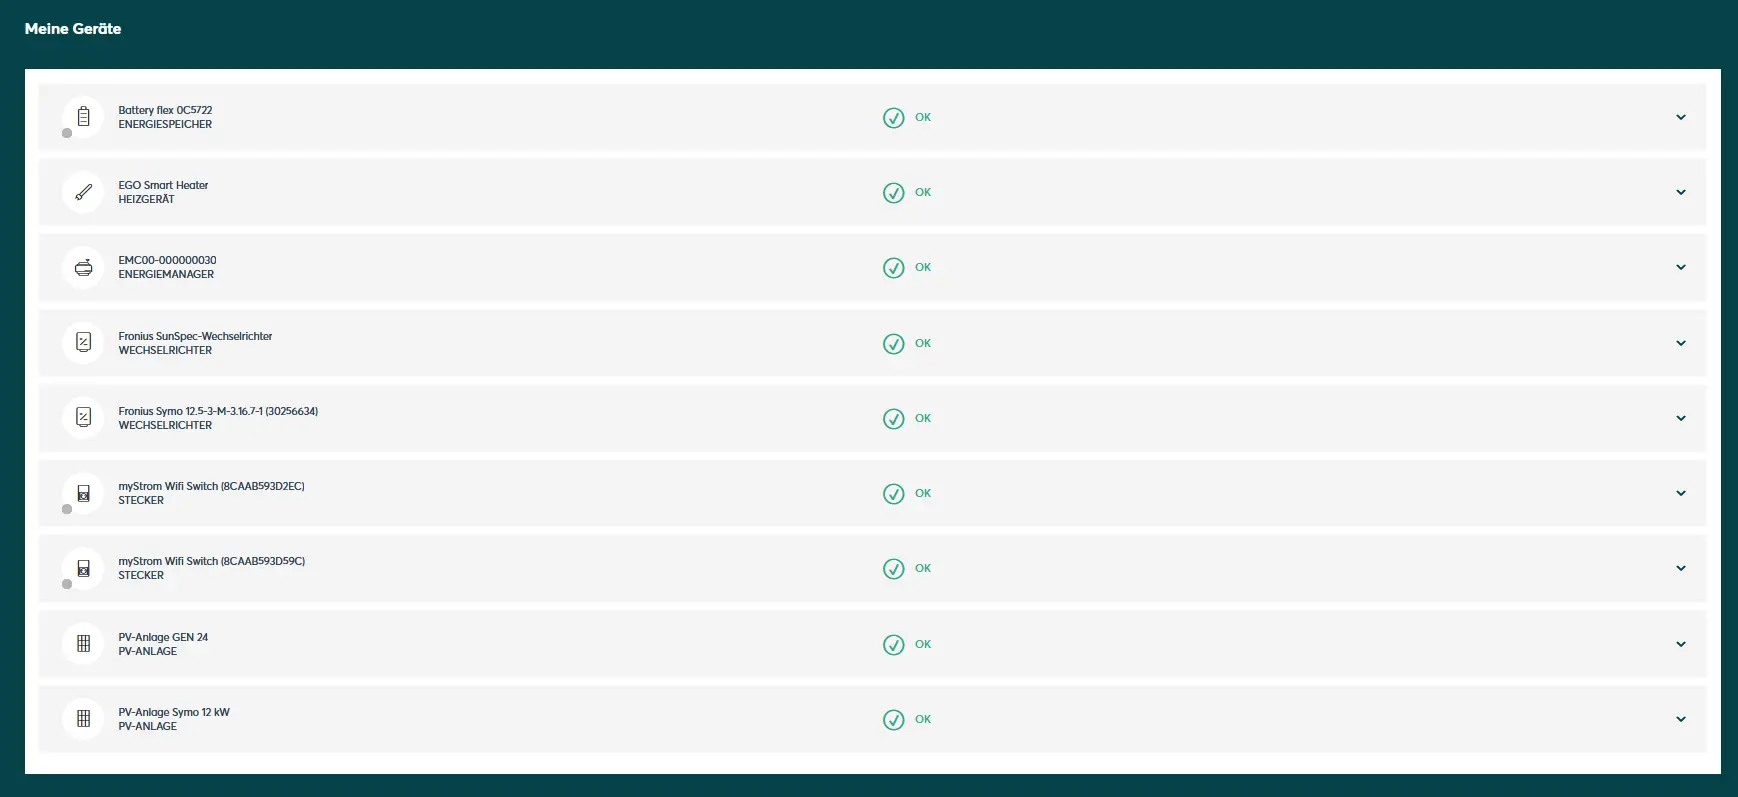
A functioning connection is indicated by a green bar in front of the respective device name. Red bars indicate a connection error.
To rectify connection errors, first check the accessibility of the device in the network. For devices that provide a graphical web interface, enter the IP address or the host name of the device in the address bar of a browser. The accessing device must be in the same network. If the web interface does not open, follow the operating instructions for the respective device.
In many cases, restarting one or more system components will help:
- of the device in the connection error (inverter, charging station, MyReserve)
- the SOLARWATT Manager
- the components of the network architecture (router, switch, PLC adapter)
Error message: Your main meter is offline
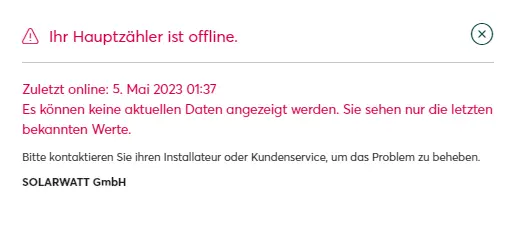
This error message appears if the SOLARWATT Manager does not receive any data from the main meter. Depending on the system configuration, this may have various causes or require measures to be taken.
It is generally recommended that you first acknowledge the error message and continue using the SOLARWATT Manager portal as usual.
If the error message occurs repeatedly and permanently, please take the following measures depending on the main meter used
The system includes a Battery flex battery storage system and an AC-Sensor (ACS) connected to it. The ACS data is provided in the network via the Battery flex.
A loss of connection between the SOLARWATT Manager and Battery flex is accompanied by a loss of connection to the ACS.
Take the following measures and assess the success by checking the connection status in the device list in the SOLARWATT Manager portal or in the Installer Center (for installers only)
Check whether the battery flex is in operation
This can be done on the basis of the LED display on the front of the device.
Restart the SOLARWATT Manager
Instructions for restarting the SOLARWATT Manager [Link]
Restart the Battery flex
The Shelly 3 EM communicates with the SOLARWATT Manger via the local network. The Shelly is integrated via WiFi.
Ensure that the Shelly 3 EM is available in the local network
General information on checking the availability of network participants can be found here.
Alternatively, use the Shelly app.
Make sure that the Shelly can be reached at the IP address stored in SmartSetup and is configured as the main meter.
Further links:
S0 meters are connected directly to the SOLARWATT Manager via the corresponding interfaces. A possible source of error is incorrect wiring at the meter connection or at the Manager.
It should also be noted that S0 meters only switch to ONLINE status as soon as pulses are detected at the interface configured for the meter. This information is lost when the Manager is restarted. This means that after a restart of the Manager, the meters remain in OFFLINE status until pulses are registered at the interface.
The system includes a MyReserve battery storage system and an AC-Sensor (ACS) connected to it. The ACS data is provided in the network via the MyReserve Command 25.
A loss of connection between the SOLARWATT Manager and MyReserve Command is accompanied by a loss of connection to the ACS.
Take the following measures and assess the success by checking the connection status in the device list in the SOLARWATT Manager portal or in the Installer Center (for installers only).
Check whether the MyReserve is in operation and available in the network
Restart the SOLARWATT Manager
Restart the MyReserve Command
Switch the MyReserve Command off / on using the toggle switch on the underside of the device.
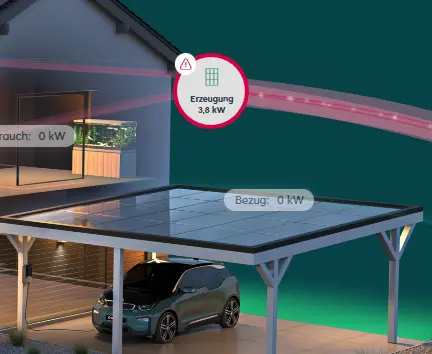
Error message: Your [inverter] is offline
A faulty connection between the SOLARWATT Manager and the inverter is indicated by a red mark on the "Generation" component in the energy flow diagram of the SOLARWATT Manager portal.
- Restarting the SOLARWATT Manager
- Restarting the inverter
- Restarting the network components
- Checking that the inverter is connected and reachable on the local network