- Home
- SOLARWATT Manager
- Installer Center
Installer Center
Table of contents
As an installer or service employee, you can use the Installer Center:
- Keep track of customers, EnergyManager and devices and view details
- Localize and identify errors based on status and error messages
- Adjust device configurations via remote access to the Energy Manager
- View and check energy data in customer applications online with the customer's rights
- Export and process data points
- View routes to customers
Log in to the Installer Center
- Open the Installer Centers https://installer.energymanager.com
- Fill in the User and Password fields.
- Click Log in.
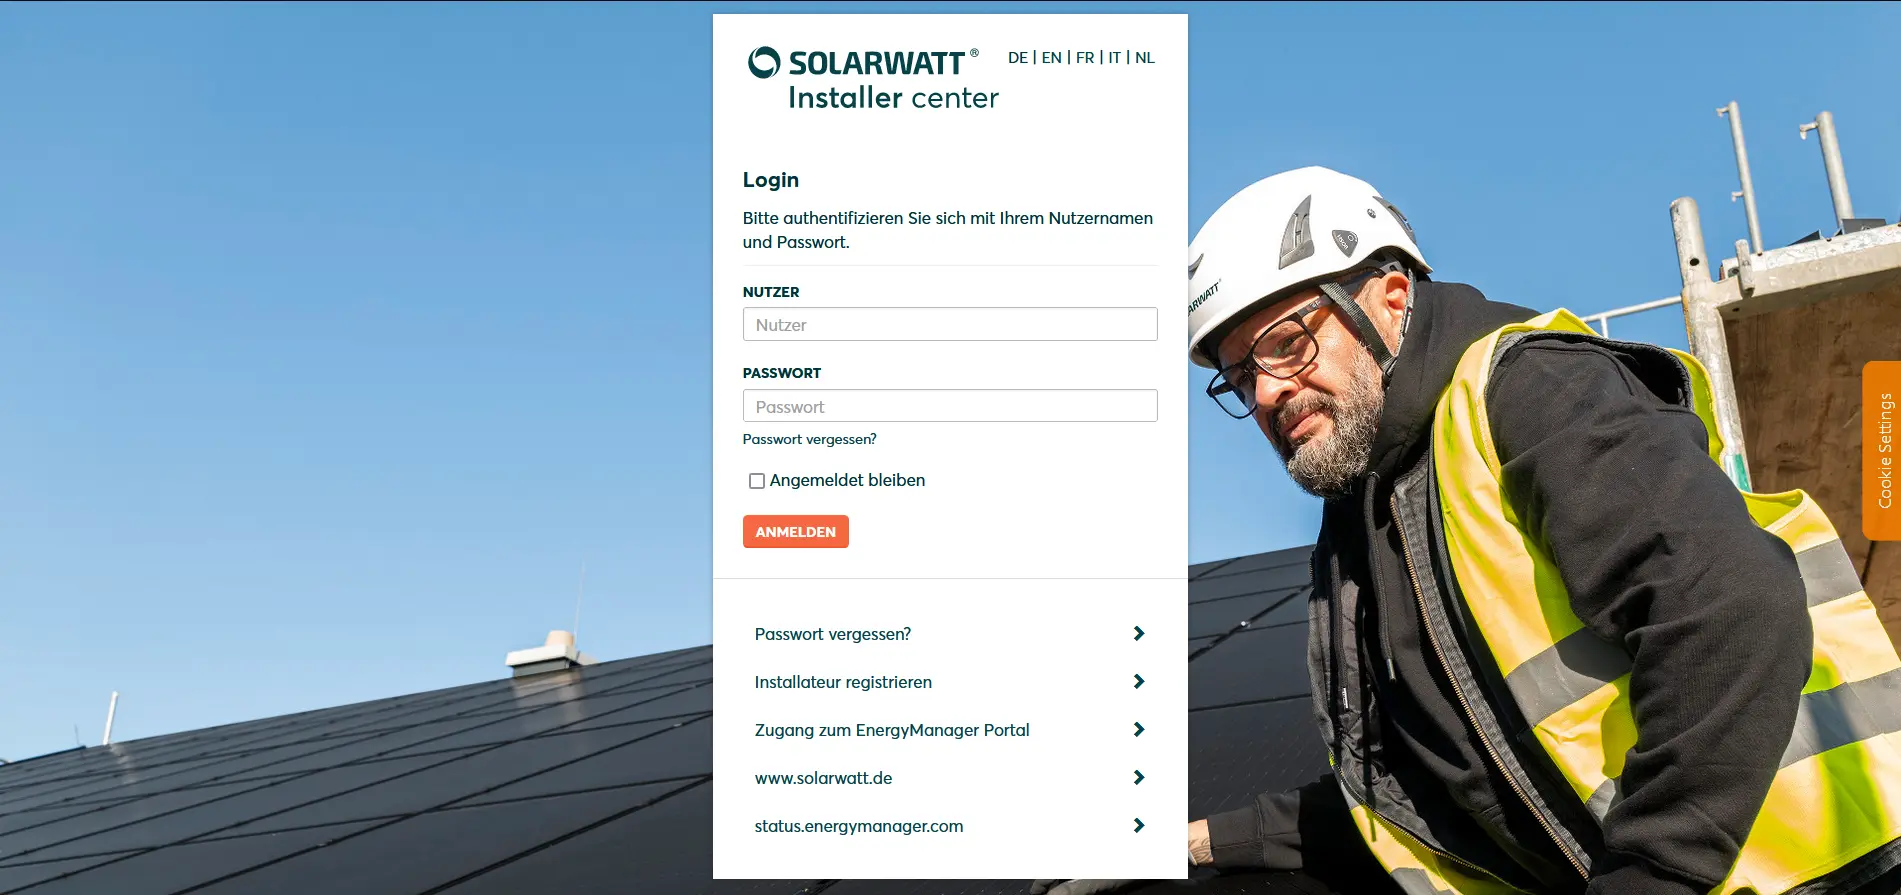
The start screen shows the main menu Customers. After logging in for the first time, no customers are displayed in the customer list.
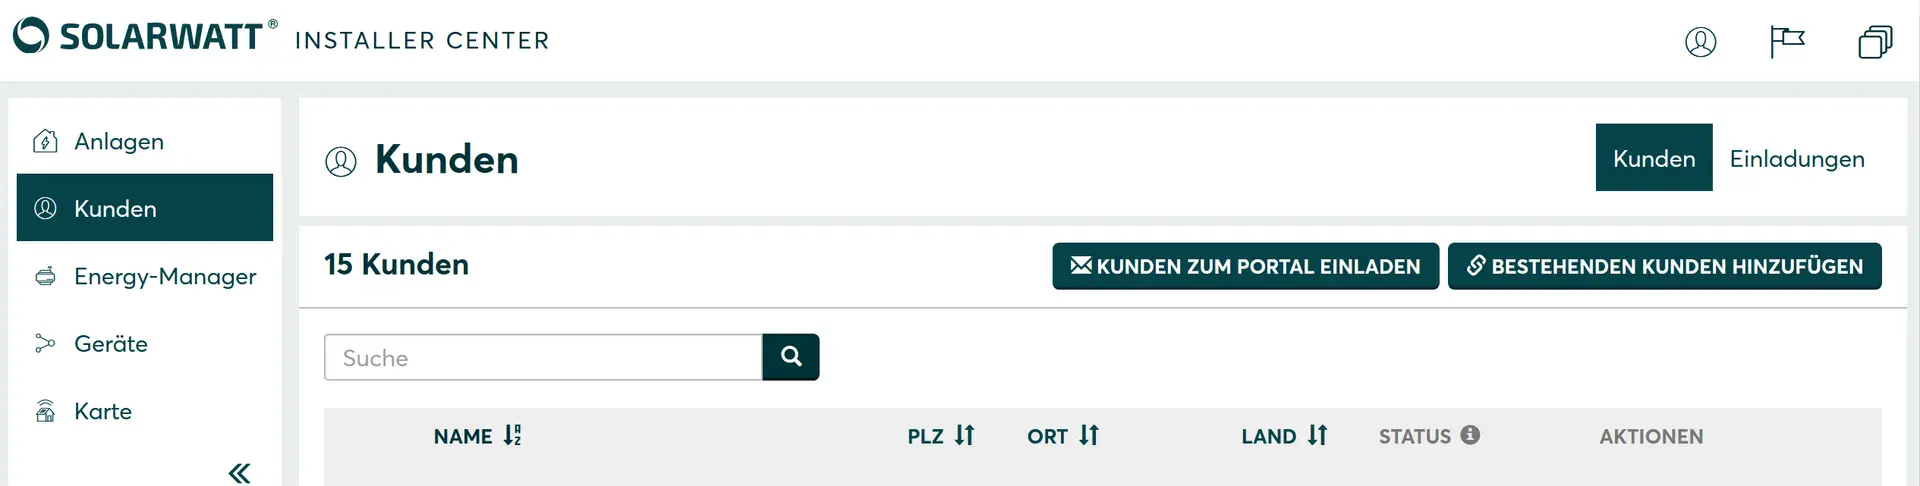
Add customers
As an installer, you have the option of adding customers to your customer list. To do this, you need the serial number and password of the relevant Manager. As a service employee, you can see all available customers of a channel in the customer list.
- Click the Add existing customer button.
The Add existing customer step 1/2 window opens.
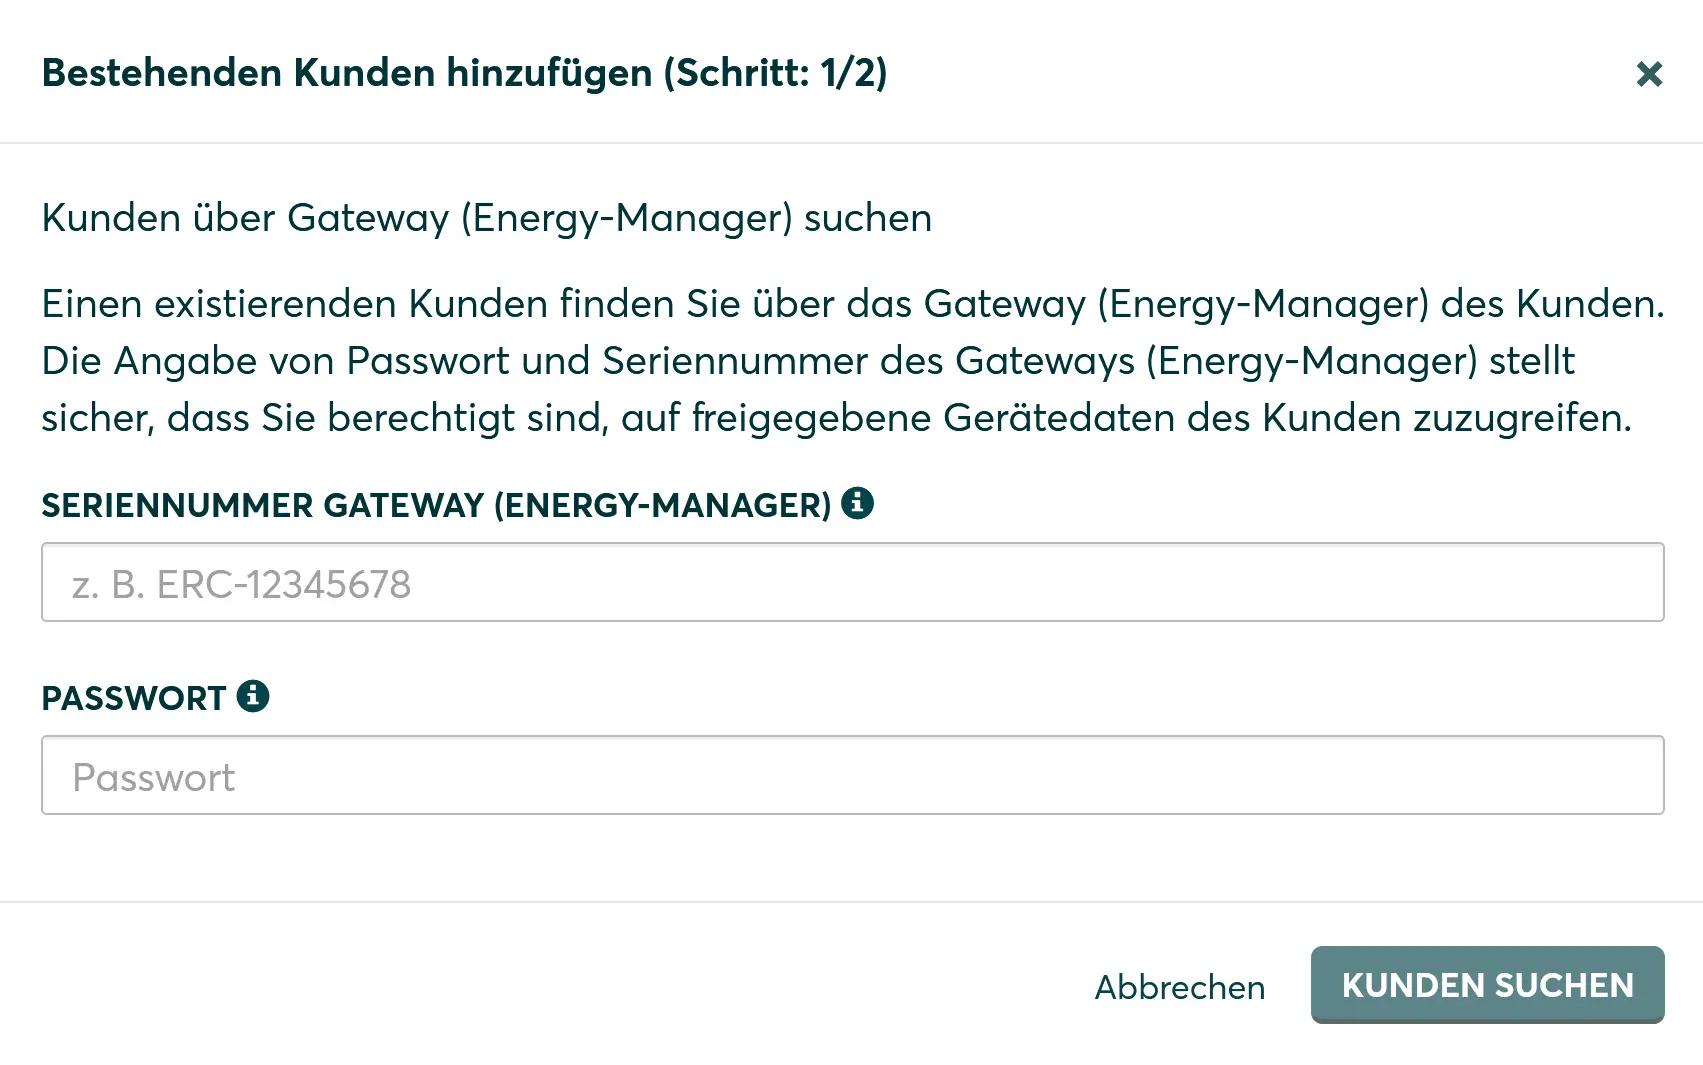
- Fill in the Device serial number (Energy Manager) and Password fields.
- Click the Search for customers button.
The Add existing customer step 2/2 window opens.
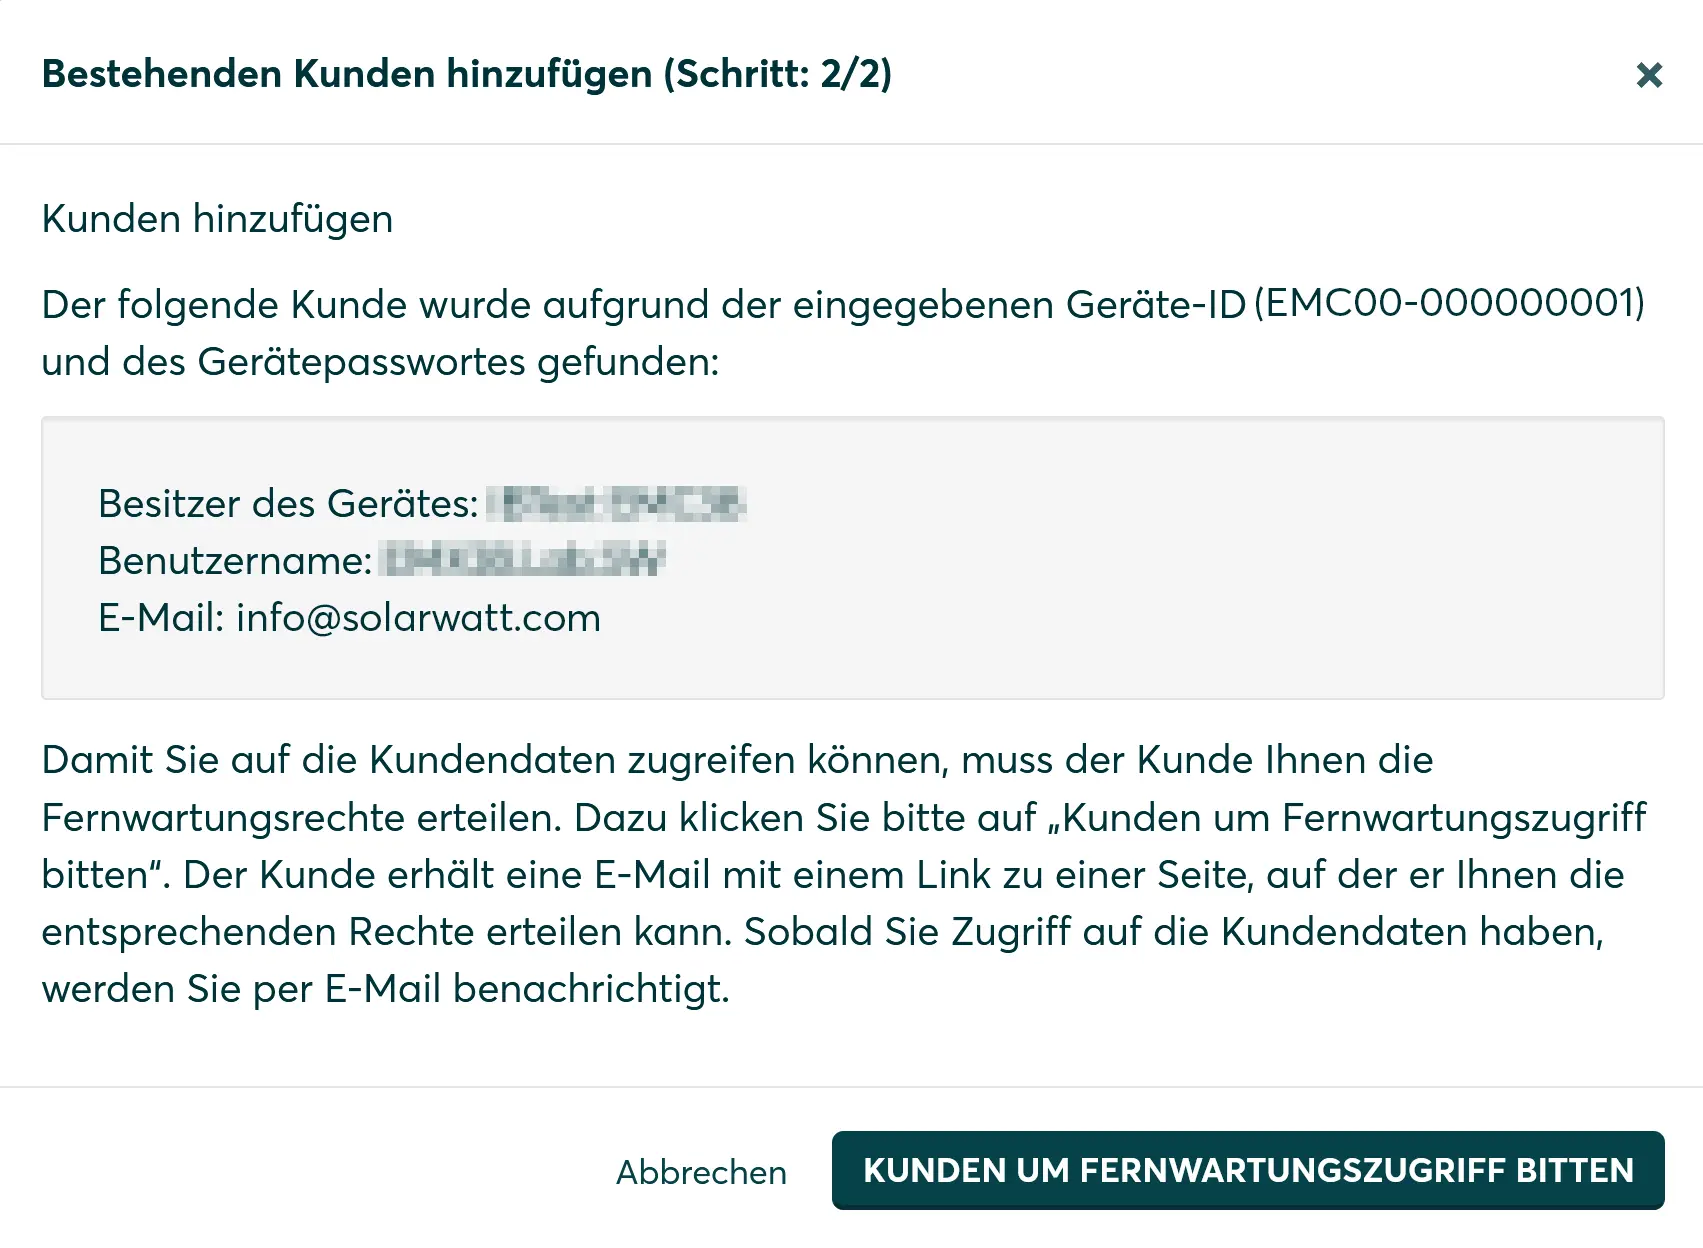
- Click the button ASK CUSTOMERS FOR REMOTE MAINTENANCE ACCESS.
The customer receives an email with a link to enable rights for monitoring and remote maintenance. After confirmation by the customer, they will be added to your customer list.
Remove customers
- You can remove the customer again by clicking the Remove button in the Actions column or the Remove customer button in Customer details.
Check status
- Identify and localize a customer's problems using the status information on the main menu pages Customers, EnergyManager and Devices. To do this, follow the instructions in the sub-chapters.
Checking the customer status
The customer status is displayed in the Status column on the Customers main menu page. The following table shows the possible statuses and their meaning:
| Customer status | Meaning |
|---|---|
| OK | All of the customer's devices (except radio-controlled sockets, see chapter Checking the device status) are working. |
| ERROR | At least one of the customer's devices has an error. |
| OFFLINE | At least one of the customer's devices has no connection to the Internet |
In the event of an error, the status of the most serious error and the number of faulty devices are displayed. Check customers with ERROR or OFFLINE status for problem identification and localization by viewing additional error details.
- Click the Customers button in the main menu. The Customers main menu page is displayed.
- Enter the name of the customer in the search field above the customer list. Alternatively, search for the user ID, zip code, city and country of the customer. The space cannot be used as a character in the search.
- The results of the search query are displayed.
- Click on the customer status in the Status column.
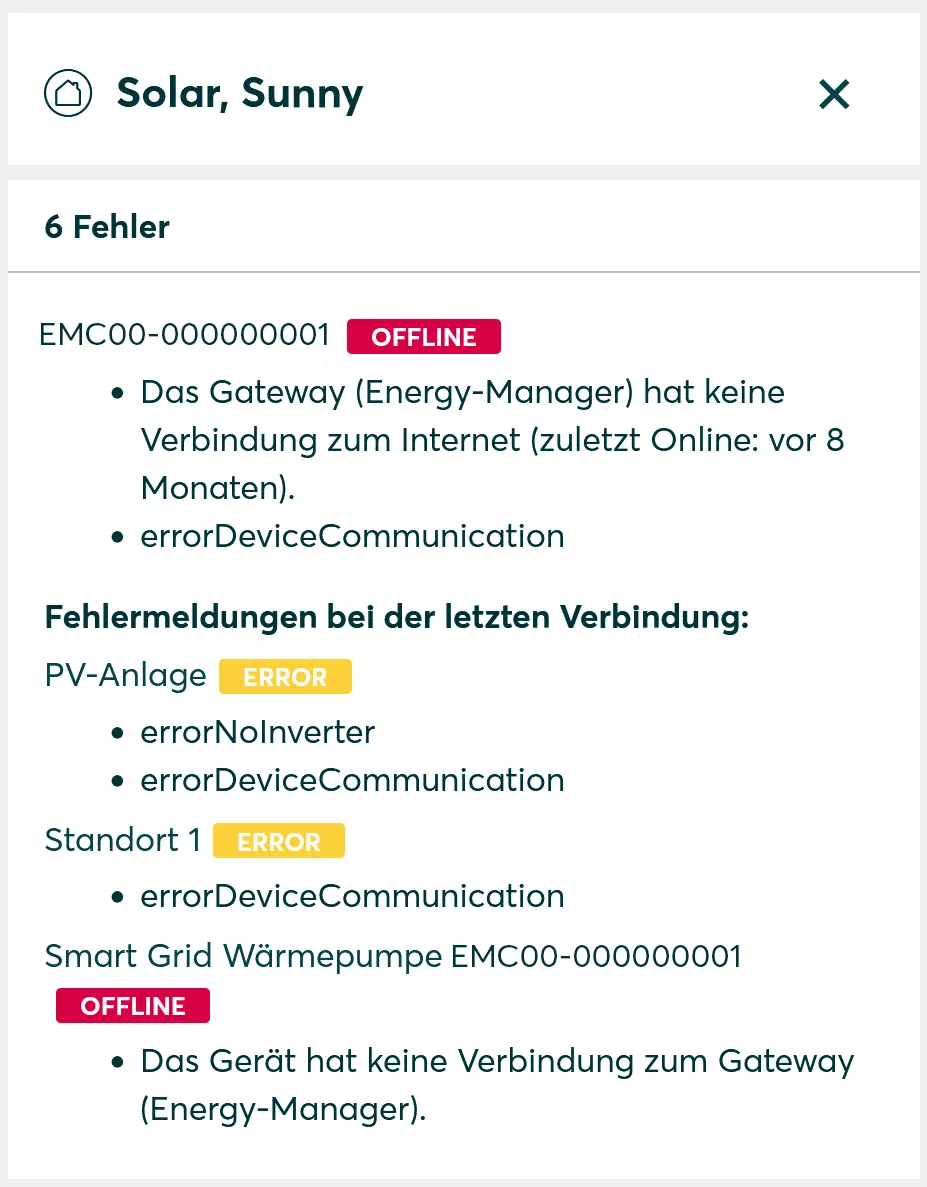
The error messages of the devices that are in ERROR and OFFLINE status are displayed. - If this information is not sufficient for troubleshooting, carry out the steps in the chapter Checking the device status for further error analysis.
Checking the Energy Manager status
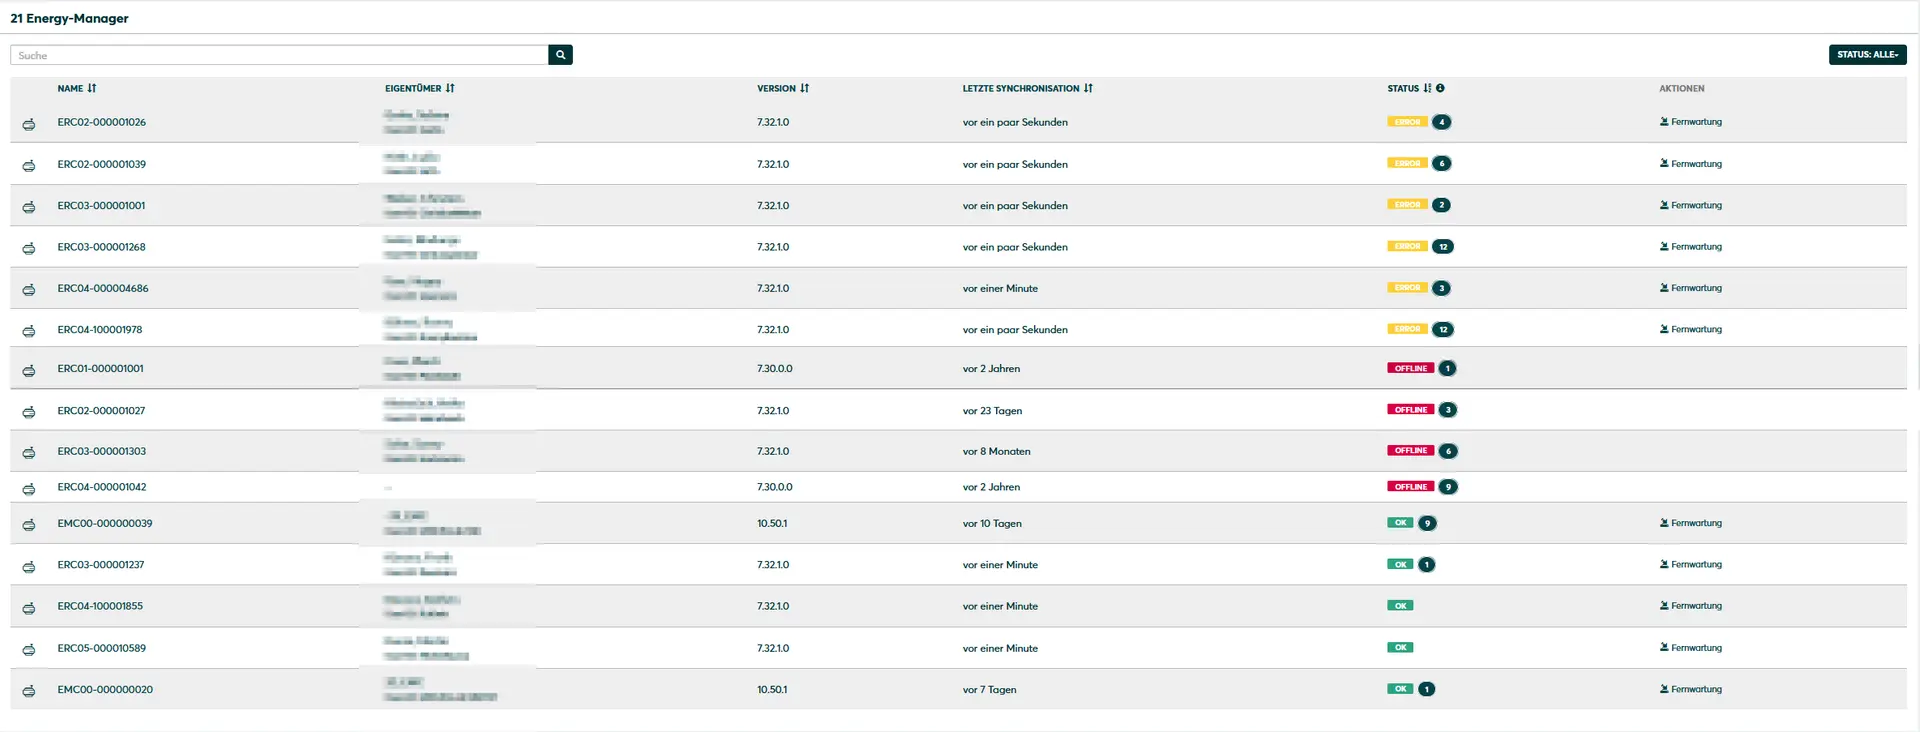
The status of your customers' Energy Managers is displayed in the Energy Manager list in the main Energy Manager menu. The following table shows you the possible statuses and their meaning:
| Energy Manager status | Meaning |
|---|---|
| OK | The connection between the Energy Manager and the Internet is working. The OK status does not show whether the devices installed on the Energy Manager are in ERROR status. |
| ERROR | The connector between the Energy Manager and the Internet is working. At least one device has no connection to the Energy Manager. |
| OFFLINE | The connection between the Energy Manager and the Internet is interrupted. No statement can be made about the devices installed on the Energy Manager. The last synchronized values are displayed. |
In the event of an error, the status of the most serious error is displayed. Check the Energy Managers with the status ERROR or OFFLINE to identify communication problems and deduce whether the Energy Manager is online or offline.
- Click the Energy Manager button in the main menu. The Energy Manager main menu page is displayed.
- Enter the name (serial number) of the Energy Manager in the search field above the Energy Manager list.
Alternatively, search for the owner (User ID) or the version of the Energy Manager. Click the Status button on the right above the Energy Manager list to list the Energy Managers sorted according to their status. The sorting is based on the severity of the error. - In the Last synchronization column, check how long it has been since the last synchronization between Energy Manager and Energy Cloud.
- In the Name column, click on the name (serial number) of the Energy Manager to view additional device information and the data points. The device details are displayed.
In the Data points area, check the individual tags and their values as well as the timestamp.
Error localization
If the Energy Manager is in ERROR status, the problem must be localized to the devices that are connected to the Energy Manager. In this case, click the Devices button at the top right to display all devices.
If all devices are in OK status, contact a service employee as there is a problem with a device driver. If at least one device has the status ERROR or OFFLINE, carry out the steps from point 4 of the chapter Checking the device status.
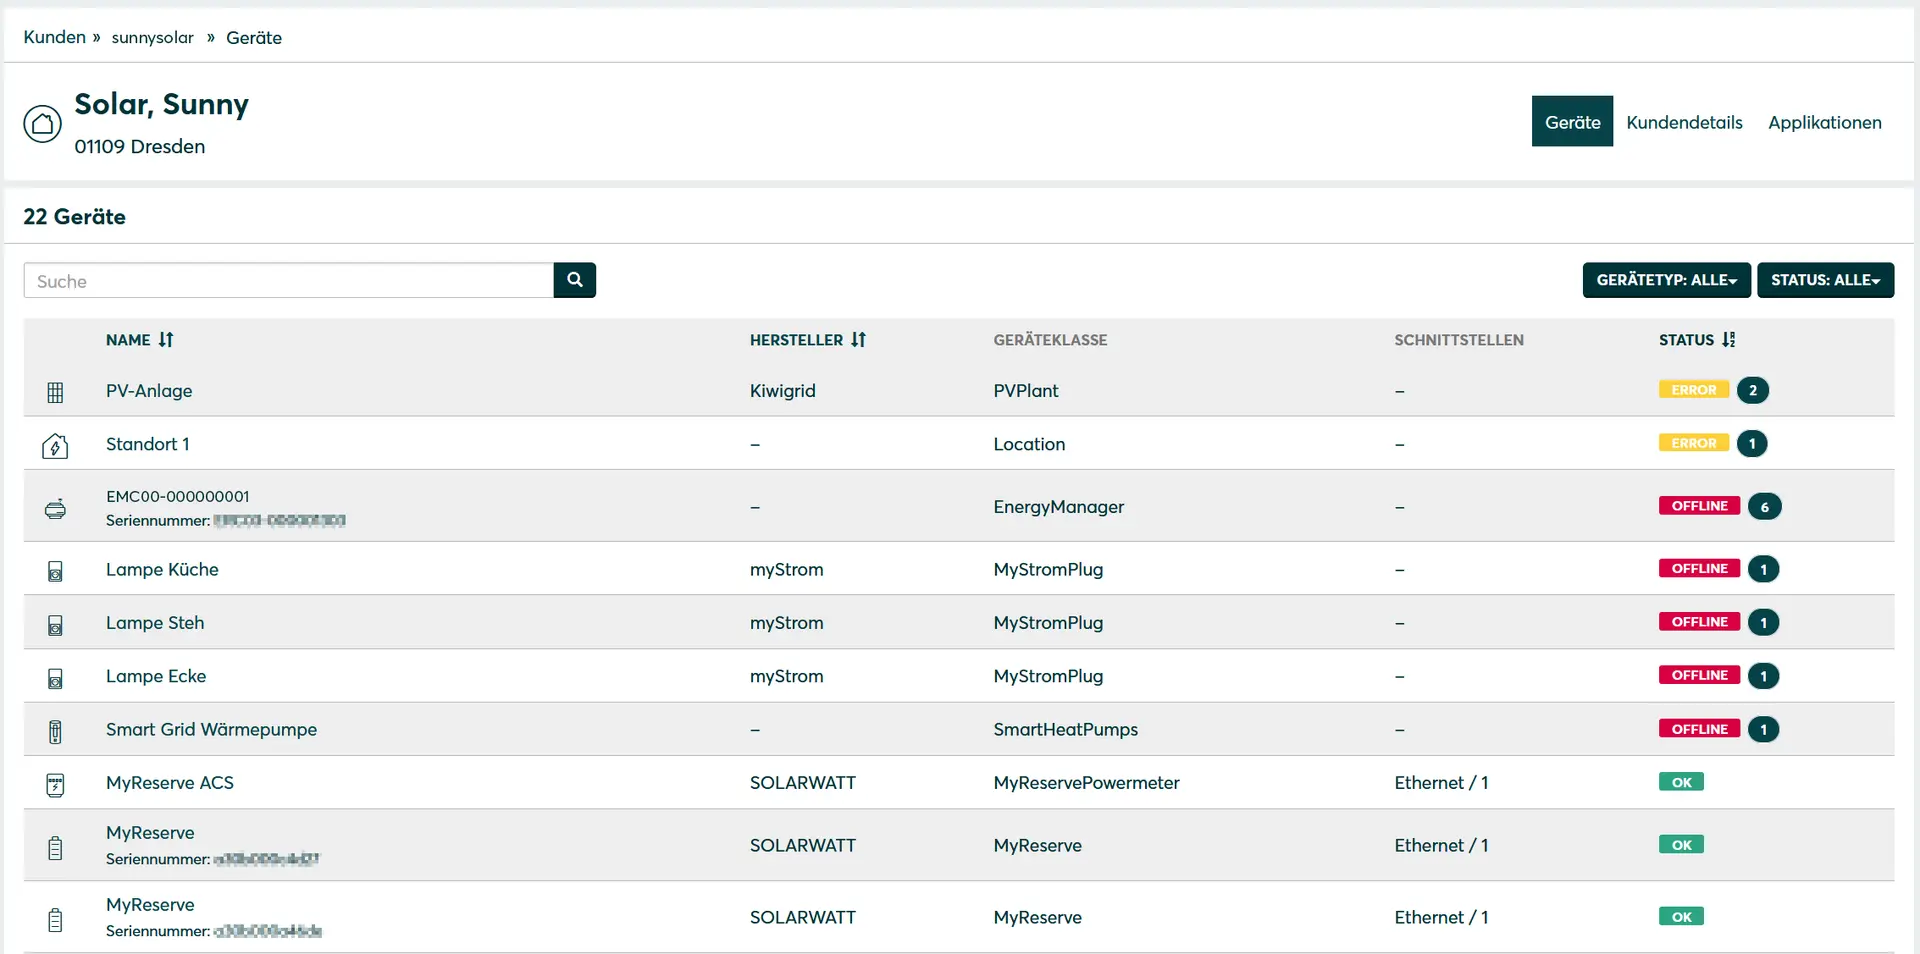
Checking the device status
The status of each physical and virtual device is displayed in the device list on the Devices main menu page. The physical device type includes, for example, inverters and meters, which you can recognize by the device class Inverter or PowerMeter. Virtual devices correspond to locations and PV plants, for example, and are identified by the Location or PVPlant device class. The following table shows you the possible statuses and their meaning:
| Device status | Meaning |
|---|---|
| OK | The device is working. |
| ERROR | The device has an error. |
| OFFLINE | The device has no connection to the Energy Manager. |
In the event of an error, the status of the most serious error is displayed. Check devices with the ERROR or OFFLINE status to identify the problem by viewing additional error details.
- First exclude the Energy Manager to which the device is connected as the source of the error. To do this, carry out the steps in the Energy Manager status chapter.
- Click the Devices button in the main menu.
- Enter the name of the device in the search field above the device list. Alternatively, search for the device class or the owner of the device. You can also filter the display using the Device type and Status buttons on the right above the device list.
- View the status and the error message in the Status column.
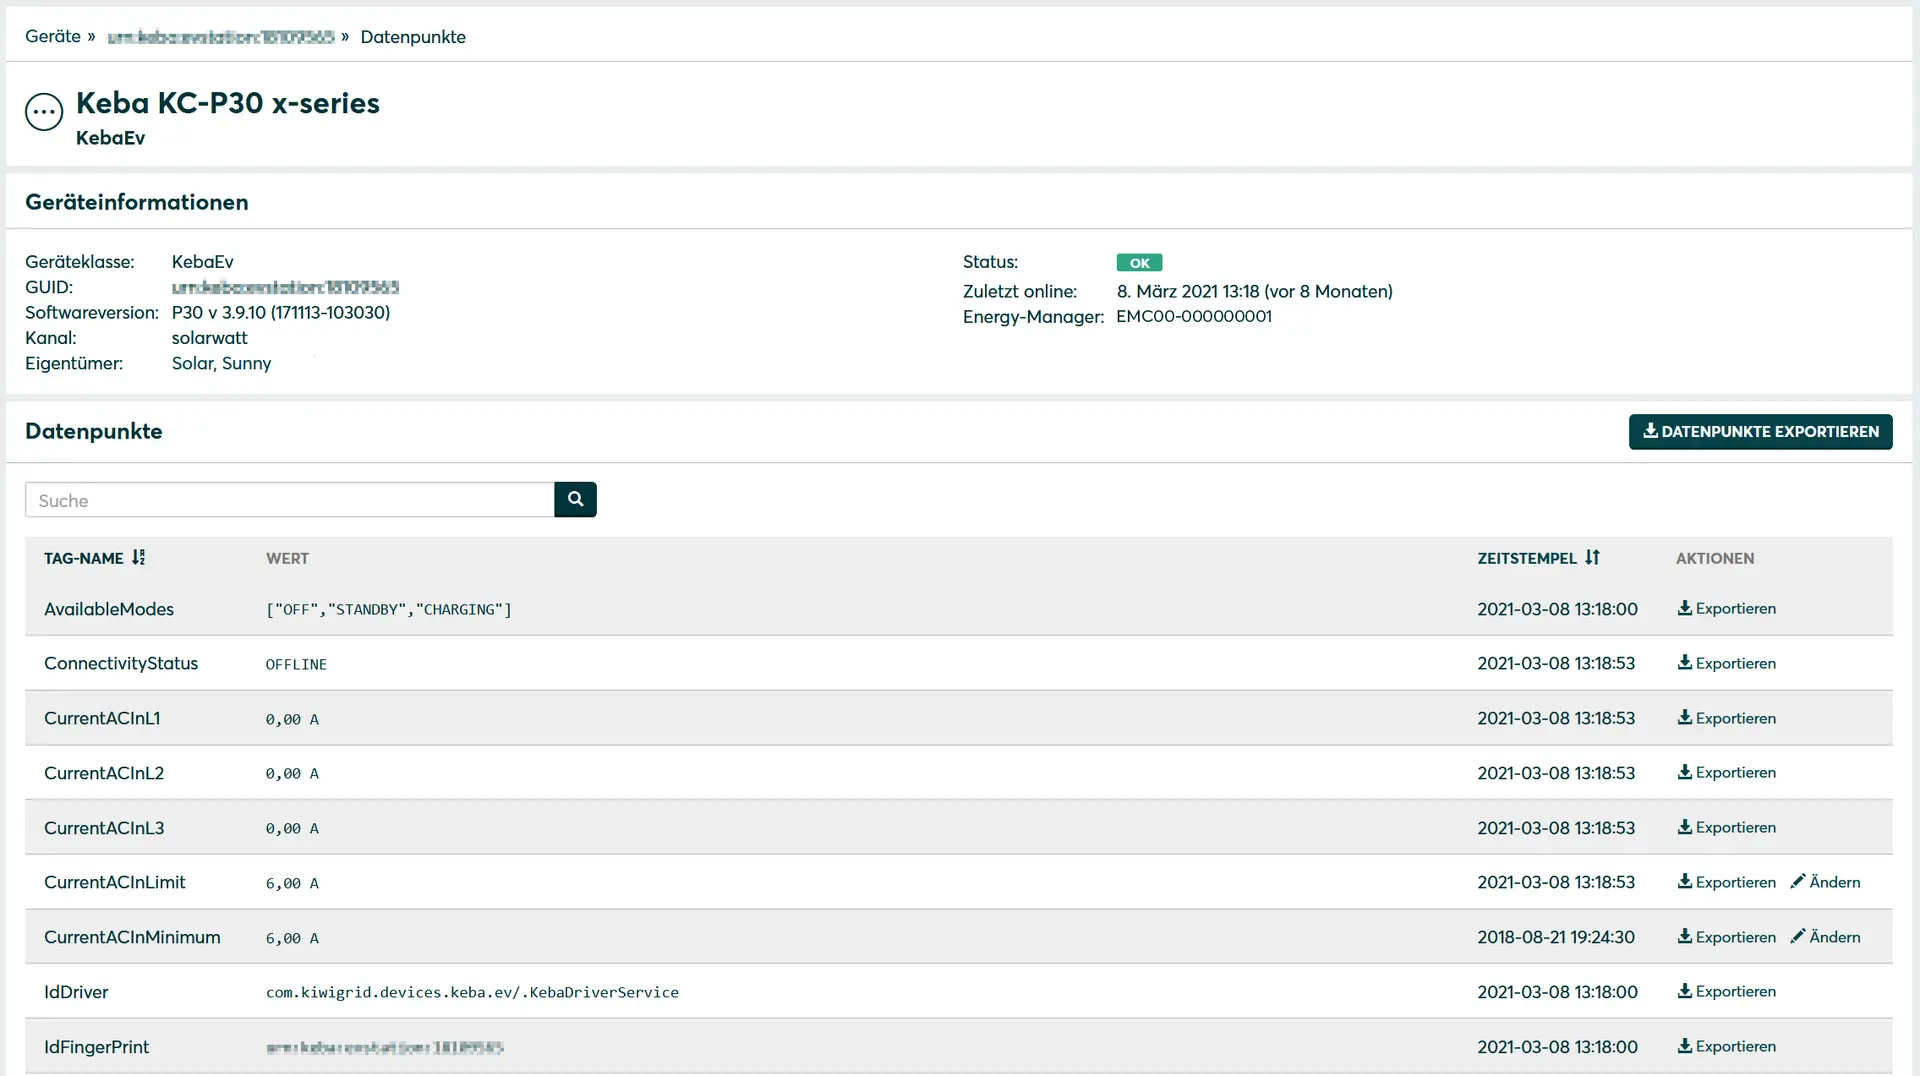
- Click on the name of the device in the Name column to view additional device information and the data points. The device details are displayed.
- In the Device information area, check the Status, Error and Last online details.
- In the Data points area, check the individual tags and their values as well as the timestamp.
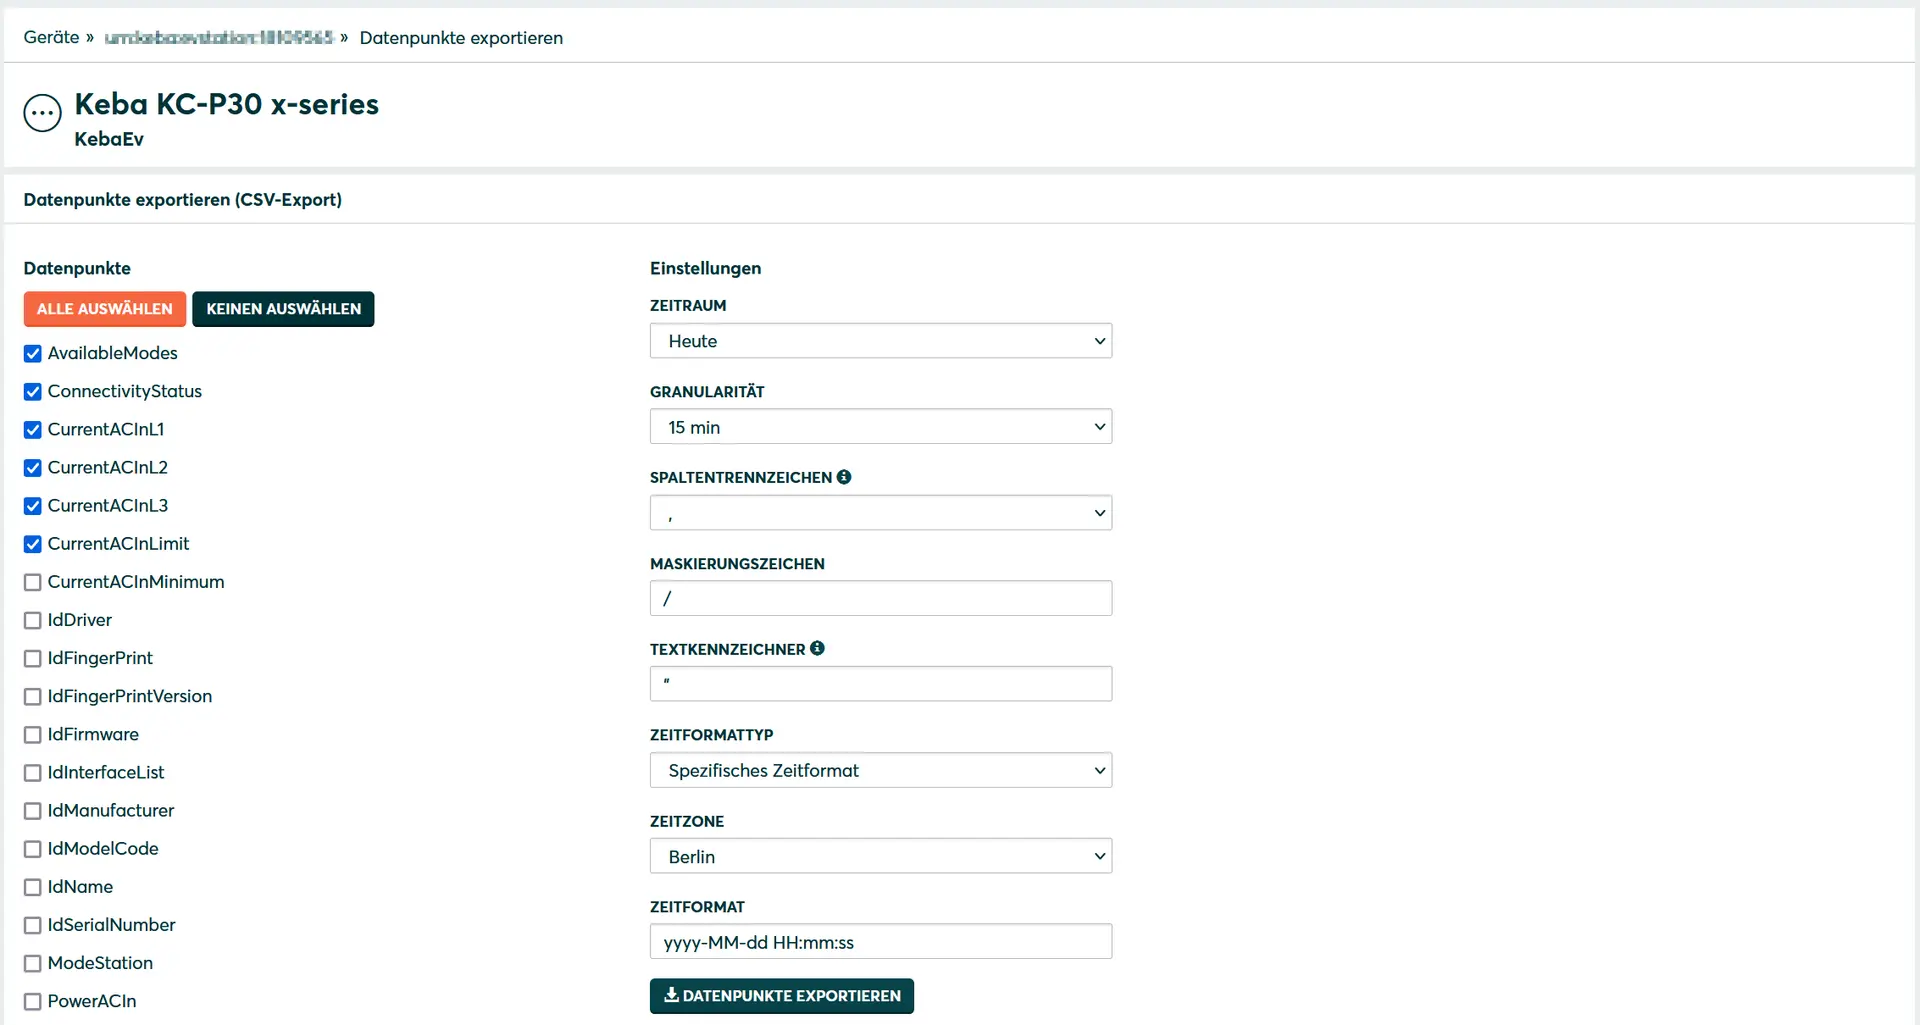
Export data points
Each virtual and physical device has a specific set of data points depending on the device class. Data points represent the measured values and attributes of the device, but are also used to store configurations or metadata. View the data points for each device and export them to identify errors, answer customer questions or perform your own calculations.
- Open the Devices main menu and search for the device. To do this, carry out steps 2 to 5 in the chapter Checking the device status.
- If you only want to export one data point, click on the Export button in the Actions column. If you want to export several data points, click the Export data points button on the right above the list.
The export settings are displayed. - Enter manual values in the fields under Settings or make a selection from the available drop-down lists. Alternatively, search for the device class or the owner of the device. You can also filter the display using the Device type and Status buttons on the right above the device list.
- Enter manual values in the fields under Settings or make a selection from the available drop-down lists.
- Click the Export data points button.
The CSV file is created. Creating the CSV file can take some time. When the CSV file has been created, the Export data points button changes to Download CSV file. - Click the Download CSV file button to save the file locally on your PC.
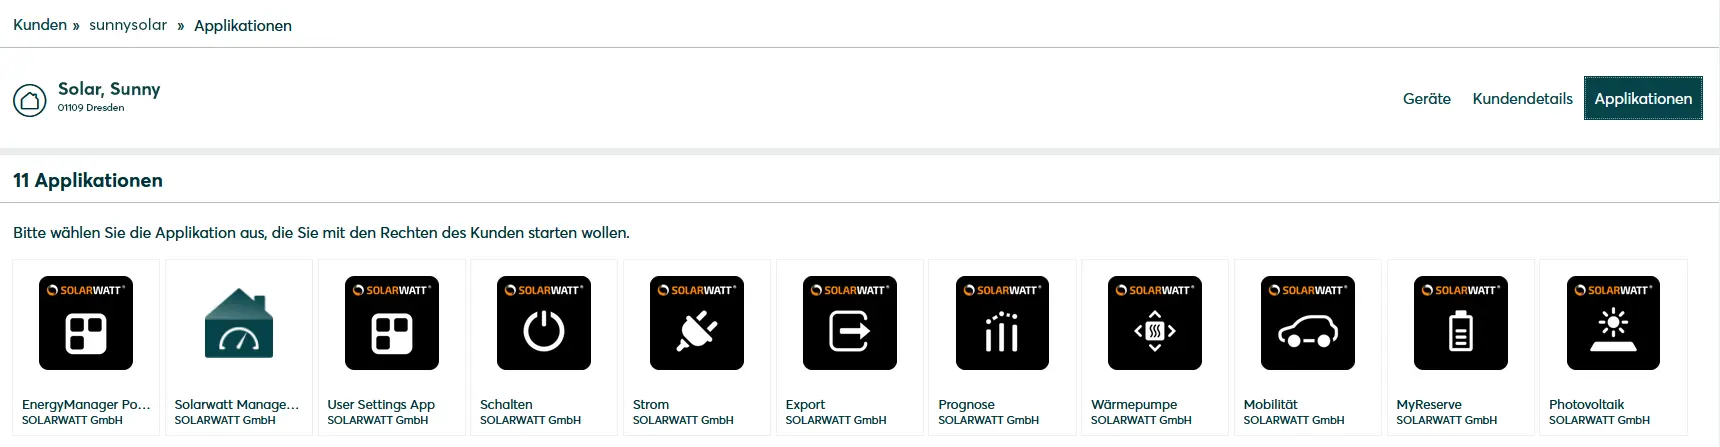
Access customer applications
If a customer has questions about one of their customer applications (e.g.: SOLARWATT Manager portal) or the historical history of energy values, it is helpful to be able to access these applications. The customer must agree to this access in advance. The customer sets the consent himself during registration on the Energy Manager under Settings > Data protection or authorizes the installer responsible for setting up the system.
- Open the main menu Customers and search for the customer. To do this, carry out steps 1 to 2 of Check customer status.
- Click the name of the customer in the Name column.
The customer area is displayed.
- Click on the Applications button at the top right next to the customer's name. Alternatively, click on the Apps button in the Actions column in the customer list to switch to this view immediately. An overview of the applications used by the customer is displayed.
- Click the button for the app you want to open.
The app is opened and the start screen is displayed.
- Check the data used by the app based on the customer question at hand.
- Click the End access button at the top of the display. Access to the app is terminated and the application overview is displayed.
Change local Energy Manager settings remotely
Change settings and device configurations by accessing your customers' Energy Managers remotely via the Internet. The customer must agree to remote access in advance. Consent is given on the Energy Manager under Settings>Privacy or set by the customer during registration.
- Open the Energy Manager main menu and search for the Energy Manager.
To do this, carry out steps 1 to 2 in the section Checking the Energy Manager status. - In the Name column, click on the name (serial number) of the Energy Manager. The device details are displayed.
- Click on the Remote maintenance button at the top right next to the name of the Energy Manager; alternatively, click on the Remote maintenance button in the Actions column in the Energy Manager list to switch to this view immediately.

- Change the necessary settings and device configurations.
- Close the window to return to the Installer Center.
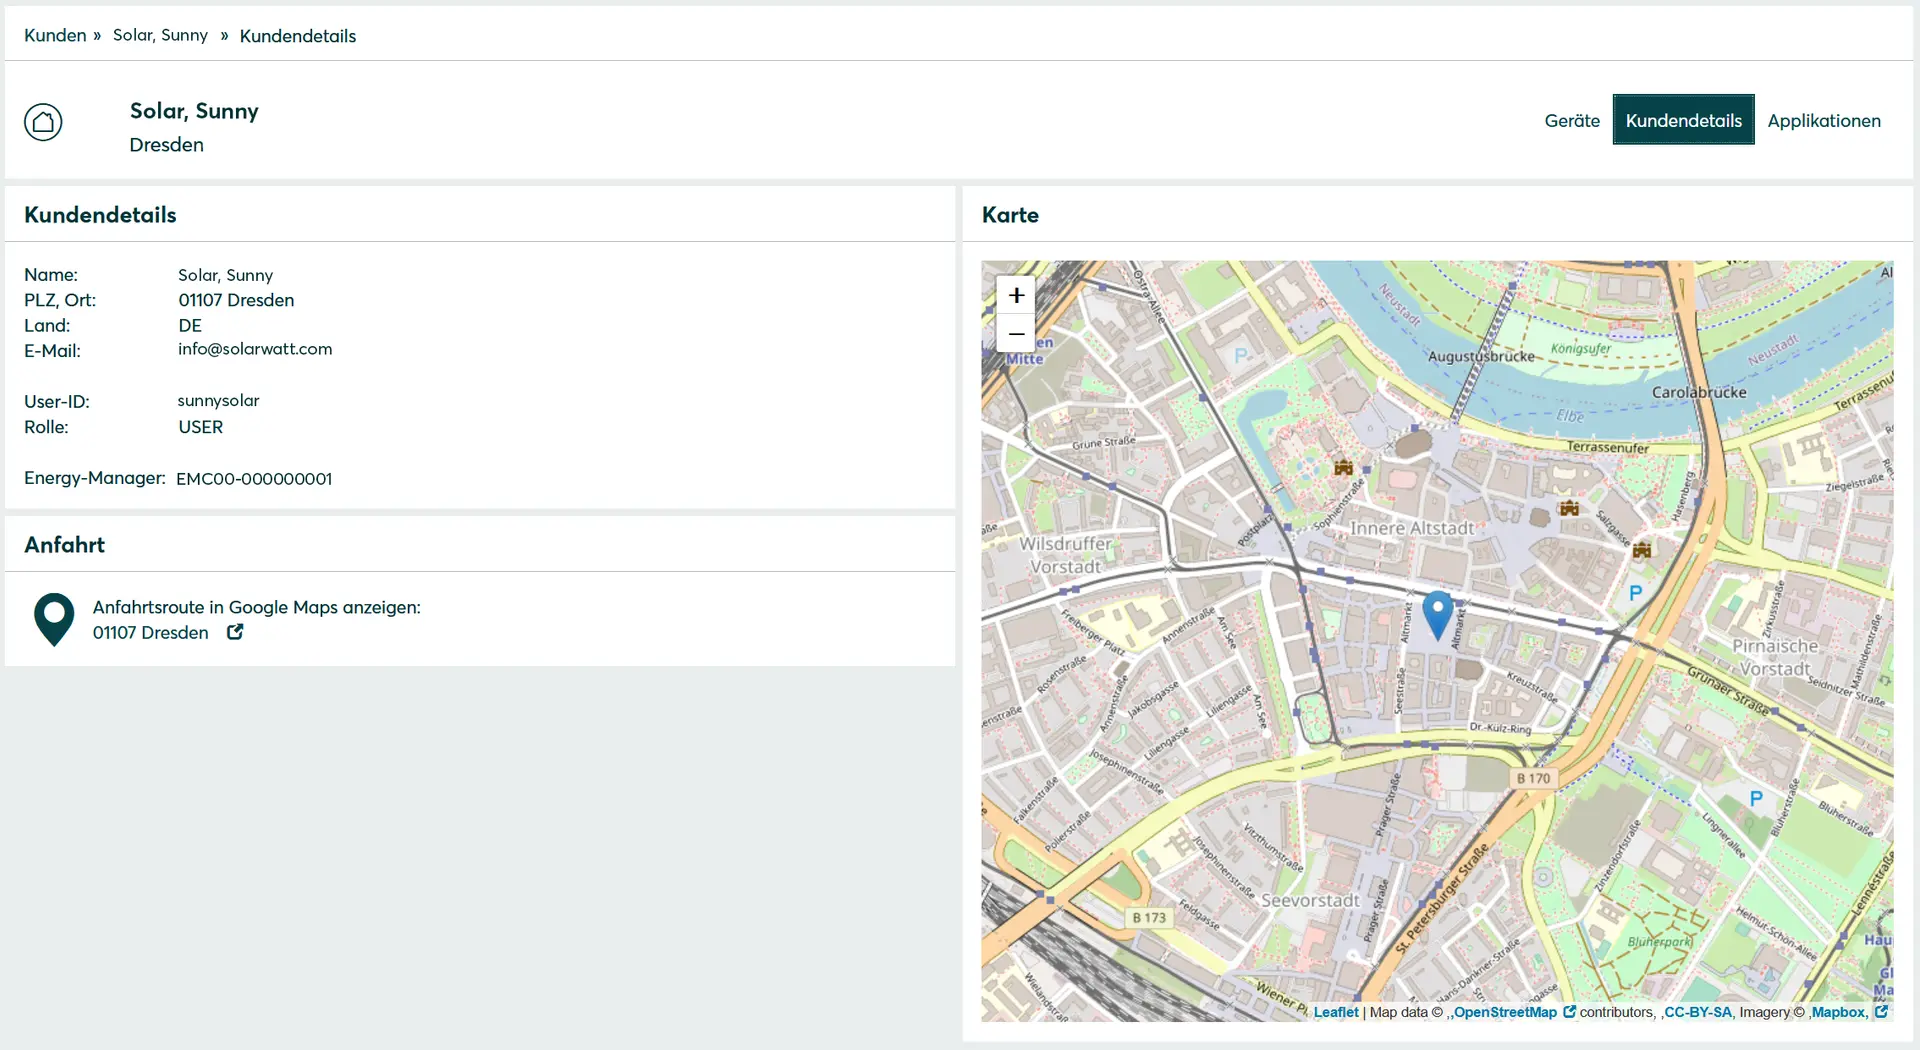
View the route to a customer
Use the Installer Center to display the route to your customer.
- Open the main menu Customers and search for the customer.
Carry out steps 1 to 2 of the chapter Check customer status. - Click the name of the customer in the Name column.
The customer area is displayed. - Click on the Customer details button at the top right next to the customer's name.
- In the Directions area, click on the customer's address and the icon. You will be redirected to Google Maps and the route will be displayed. Google Maps uses the address of the currently logged in user as the starting point (see chapter Change user settings).
- Close the window to return to the Installer Center.
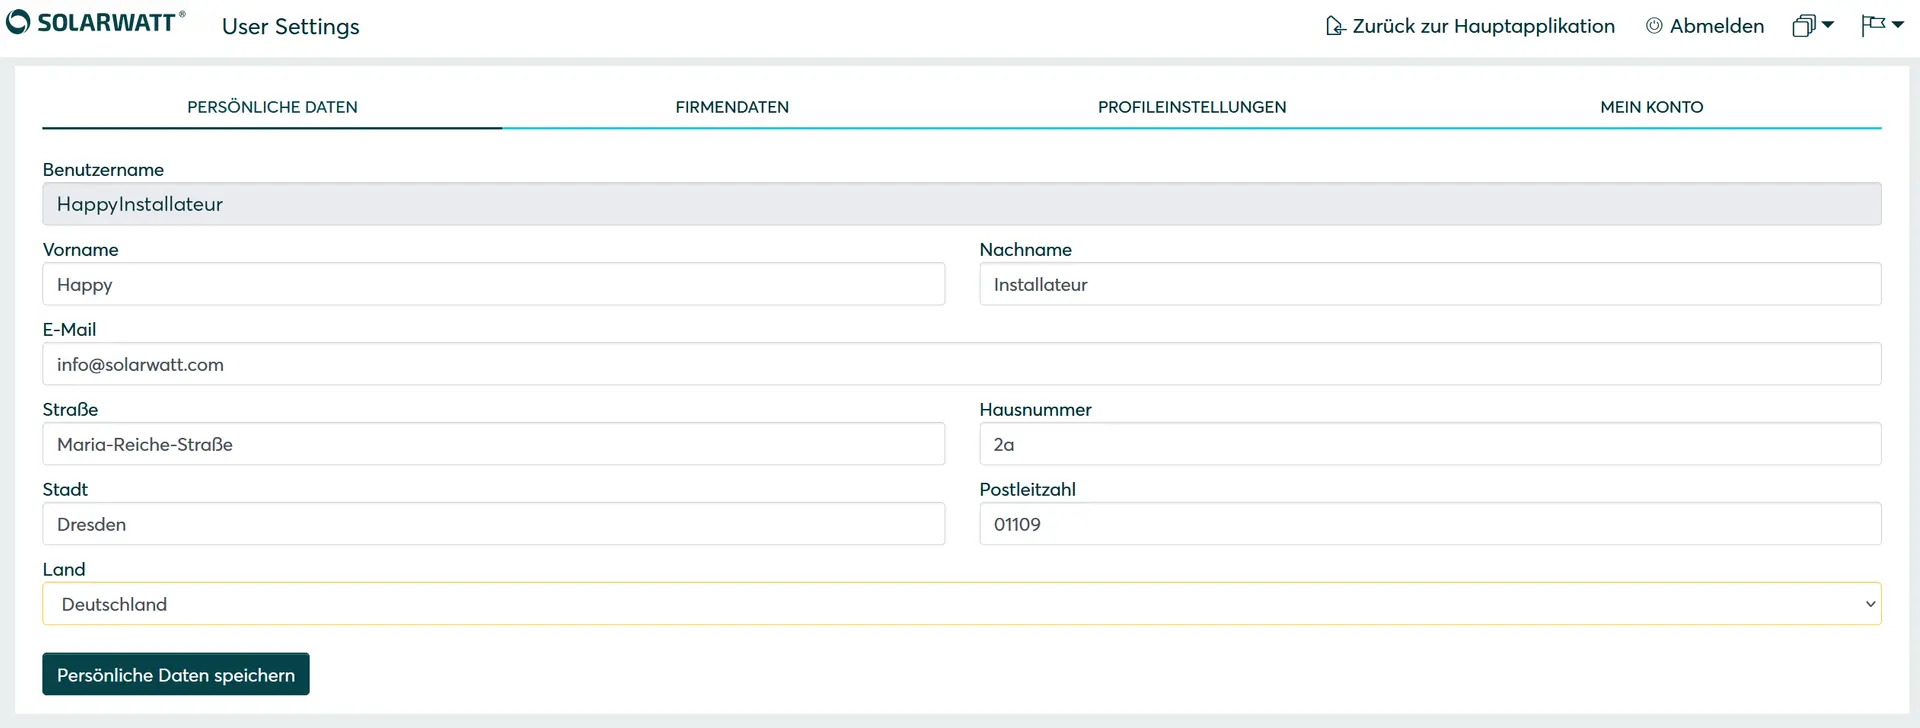
Change user settings
Change your user settings, such as your personal data or your password.
- Click on the following button in the navigation bar.
- Click on the User account button in the drop-down list.
- The user account is displayed in the separate Cloud Desktop app.
- Change the desired user settings.
- Click on Back to the main application in the navigation bar.
You will be redirected to the Installer Center start page.