- Home
- SOLARWATT Battery & Inverter vision
- Commissioning
Commissioning
This page describes the commissioning process of the SOLARWATT Battery vision system, consisting of SOLARWATT Inverter vision one or Inverter vision three and a tower consisting of Battery vision top pack with packs.
- Switch on the DC switch on the inverter
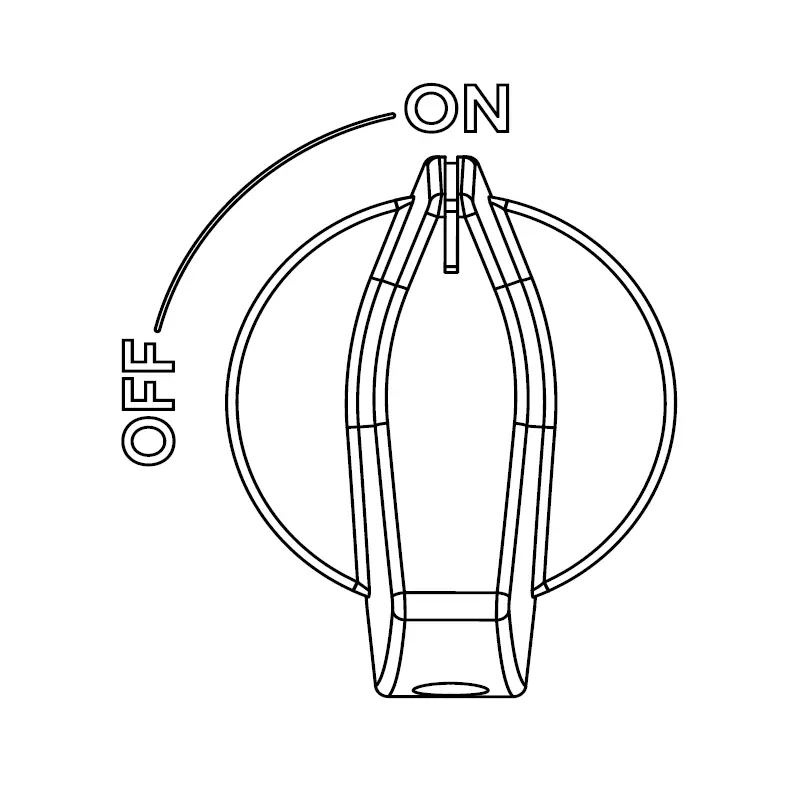
DC switch ON
- Switch on AC fuse GRID
- Switch on AC fuse BACKUP (if necessary and available according to local regulations)
Video: Commissioning SOLARWATT Inverter vision one (single-phase)
Information on how to operate the inverter display with the screen buttons can be found at Structure and scope of delivery.
The inverter will then display "Starting..." and the Inverter will automatically navigate to the 'Power On Set' menu. You must now:
- Set the country code (Safety menu item)
- Set the time and date (Date & Time menu item)
Caution! It is important to set the date and time correctly so that the monitoring data is sent to the SOLARWATT Manager with the exact time stamp.
- Confirm Press the button (checkmark) on the inverter display for 3 seconds
- Select Start
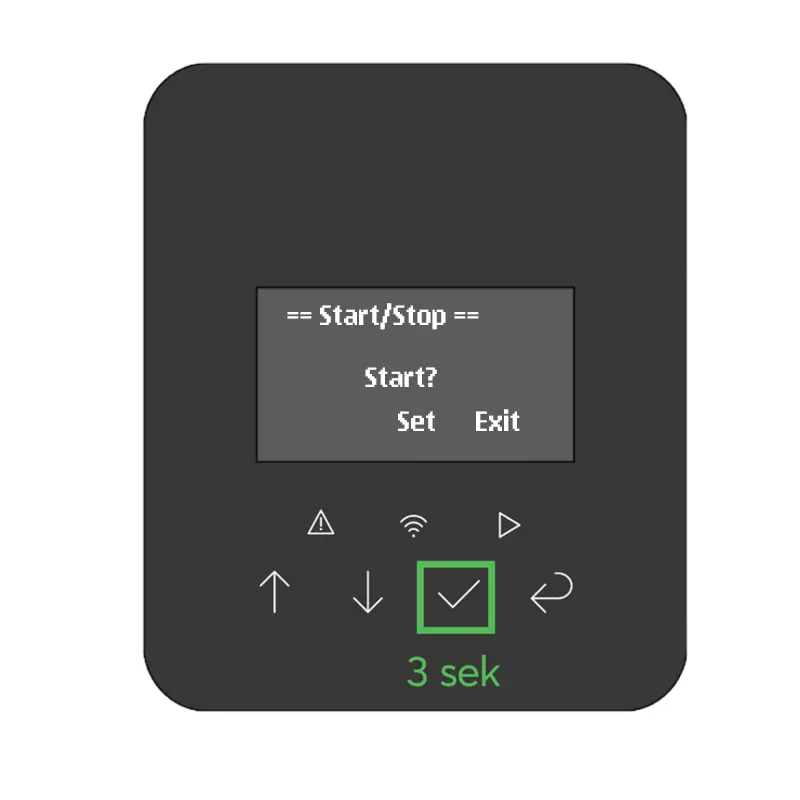
Start inverter
While the inverter is waiting for a battery to be connected, "Waiting..." will be displayed on the screen.
- Switch on the DC switch on the battery (top pack)
DC switch ON
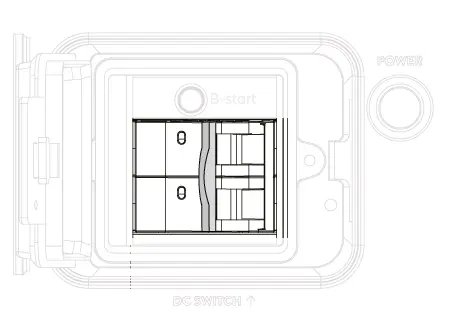
- Press the POWER button on the battery (top pack)

Power button
The inverter establishes communication and starts its self-test routine (the remaining test duration is counted down in seconds next to Checking).
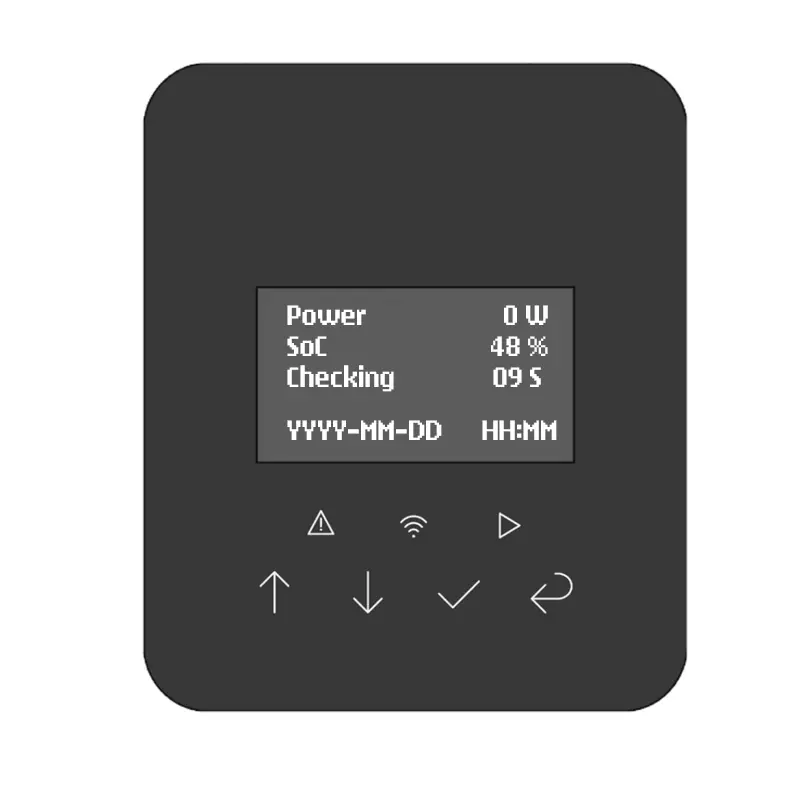
Inverter test function
The Inverter will then enter normal operation.
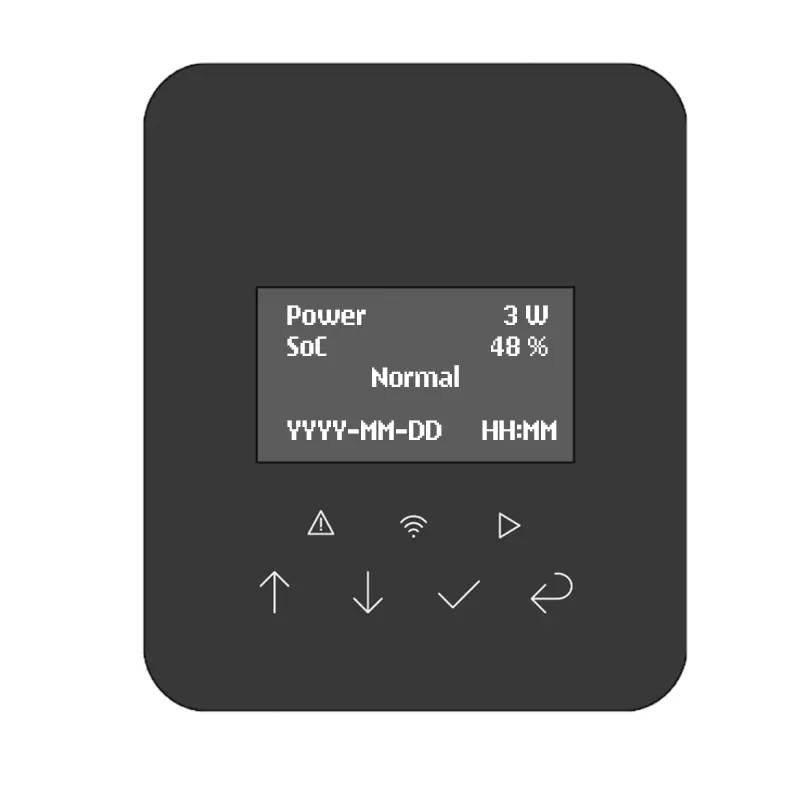
Inverter normal operation
Important settings for Inverter vision one in the 3-phase grid
If the Inverter vision one was installed together with the three-phase meter DTSU 666, it is important to configure the inverter in the next step so that it communicates correctly with the 3-phase meter.
To do this, proceed as follows:
- use the arrow buttons to call up the Settings menu and then the Feature menu
- in the Feature menu, use the arrow buttons to select Meter/CT and then Set
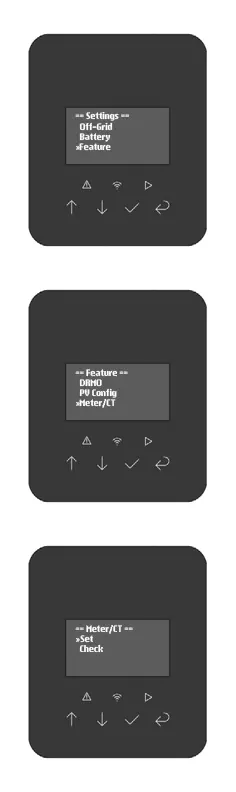
Configuring Inverter vision one with a three-phase meter.
- use the arrow keys to search for the Meter_3P entry and confirm with Set
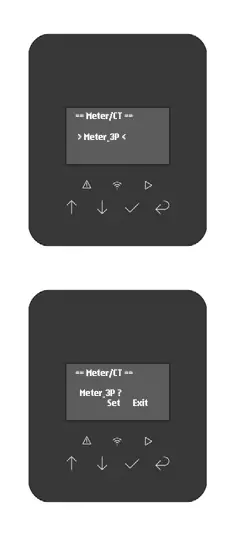
Configure inverter one for 3-phase meter (2))
Video: Commissioning SOLARWATT Inverter vision three (three-phase)
Information on operating the inverter display can be found at Structure and scope of delivery.
The inverter will then display "Starting..." and the Inverter will automatically navigate to the 'Power On Set' menu. You must now:
- Set the country code (Safety menu item)
- Set the time and date (Date & Time menu item)
Caution! It is important to set the date and time correctly so that the monitoring data is sent to the SOLARWATT Manager with the exact time stamp.
- Confirm Press the button (checkmark) on the inverter display for 3 seconds
- Select Start
Start inverter
While the inverter is waiting for a battery to be connected, "Waiting..." will be displayed on the screen.
- Switch on the DC switch on the battery (top pack)
DC switch ON
- Press the POWER button on the battery (top pack)
Power button
The inverter establishes communication and starts its self-test routine (the remaining test duration is counted down in seconds next to Checking).
Inverter test function
The Inverter will then enter normal operation.
Inverter normal operation